Monday, May 26, 2014

my friend Robyn's beautiful home


I didn't get to properly show off my friend's gorgeous home in my recent posts about Rio. While I was there I spent a goodly amount of time wandering around her house just oohing and ahhing (and taking mental copycat notes). I was finally able to persuade her to take some shots of her decor and send them to me so I could show you guys. 

Their space is absolutely flooded with crazy great light from the wall to wall balconies, plus the bright white walls. I think Robyn has done a fantastic job of warming it up with lots of color and homey textiles. It strikes a perfect balance of light, color and comfort. Lovely.


Homemade cushions abound. I love that Nani IRO fabric.


So charmed by the curated collections on her bookshelves, which are organized according to color.


Fabulous family art wall. Very honored to have my work featured! :-)


I thought she must have found this awesome painting at Hippie Feira but nope, she organized an empty canvas and gave brushes to her three kids. This is their masterpiece! I'd love to do that with my own girls. That's a handmade cushion on the bench.


This is her collection of oils from various art fairs and galleries. Such a great sampling of local art. More handmade cushions on the couch.


Her dining room!


Handmade table runner. The metal chairs!


Love love love the eclectic plate wall. Such a well-balanced amorphous arrangement and perfect touches of color. Great solution to the huge white wall.


From her master bedroom. Coral hues and homey patchwork. That's a souvenir needlework cushion from their recent family trip to Peru.


The foyer. Lots of personal family keepsakes.  I love the pop of red from that painting.


 The view from one of the balconies. Wow.


And here's one of Robyn I snapped while I was there. That's her bedroom behind her. The open balcony doors keep a refreshing breeze constantly blowing through the house.


Rich working hard on the main balcony. Can you see the tightly stretched netting? It's to keep important things like coffee cups and children from falling over the railing.

Thanks for the lovely tour, Robyn!

Monday, May 19, 2014

miette skirt, second round


I forgot to blog this linen blend Miette wrap skirt, which I have been enjoying for several weeks. It's really worth it to put in a lining, which I sewed into the waist and side hems, but left loose at the bottom.

After making the first attempt, the one thing I didn't like was that the hem hung shorter in the back than the front. So this time I added a half inch to the hem of the right and left panels (which end up being the back of the skirt when it's on). Worked like a charm. If you are trying a Miette for the first time you might keep that in mind when you hem.


Despite not being the best candidate for this style of skirt (I'm thick waisted and have a short body) I still think it looks cute enough on. Sorry for the real life skirt wrinkles; I wore it to worship before taking this picture so it had gotten squished in the car and in the pew.

Friday, May 16, 2014

partridge & pear update


**This design is now available as a PDF pattern!**

 OK, y'all, I'm back in the saddle now as far as this Partridge & Pear ornament pattern goes. I have worked out the embroidery transfer method that had me so stymied a few weeks ago (let me just say, you are going to love how easy it is) and I'm currently writing the pattern and cranking out samples. Those two you see above were just finished using the final pattern.

Just wanted to throw out this update for those who are very patiently waiting for the pattern! Progress is being made. Thanks again for your great advice, Wendi and Abby!

Monday, May 12, 2014

my youngest is not ten


Not possible. She was born in 2004 though...I know because I was there. But she is still not ten, nope nope nope. However, we did throw her a birthday party.


She is so silly. I wonder where she gets that from?

She requested an ice cream sandwich cake for her party, so this year I tried this recipe (only with neopolitan sandwiches and fresh whipped cream instead of Cool Whip). And Great Scott, is it SWEEET. A little goes a very long way. I actually sprinkled a little salt on my slice and that helped (OK, it was my second late-night-nobody-else-up piece). It sure slices up pretty though.


Here's the traditional momma-made skirt and store-bought tank outfit. She loves it! Yay. The skirt is another Flirting The Issue skirt, which is a great free pattern from AMH. You have to read the bit about a young Anna wearing a skirt around her neck and trying to get away with it. Very funny.


The more I sew channel elastic the better I like it than shirring. It's less scary/iffy to me. I made a couple minor mods in the pattern for my birfday girl:


1) I used three channels of elastic instead of four 
2) I made the rectangles of fabric a few inches wider than the formula because she likes volume (so do I)


Isn't this pretty fabric? Perfect for a summertime skirt. It ain't cheap, but was on sale 40% off at Joann and also got my 15% teacher discount, ka-ching! (It applies to home school teachers too, so get your card!)


Anna's pattern is nice because it has a built-in lining, and this fabric needed a lining anyway. I just used some white muslin I had in the stash.


And the traditional mixtape. They both look forward to their birthday mixtapes every year, so I enjoy doing it, even if I was up until one a.m. putting it together the night before. I think it's a tolerable mix of sugary MLP/Disney songs, songs from my youth and newish alternative rock songs that were chosen more for their infectious beats and melodies than for the themes.


But as I think of it, they do match her dramanality quite a bit.

Thursday, May 8, 2014

make a felt bouquet card for mom


I like to make cards. As well you know. Here's this year's handmade Mother's Day card. It's made of handcut felt flowers and leaves with a paper punch label in the middle.

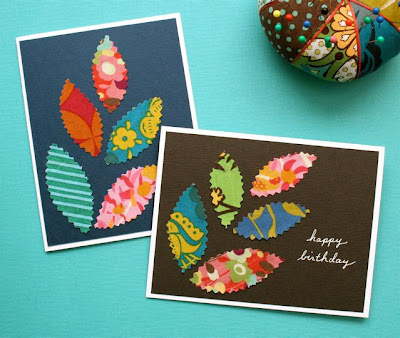
Would you like to make a similar card? It's a cinch to make if you have some know-how, pretty felt and a little time. I'd say it is intermediate level crafting. Bonus: these flowers won't wilt and they won't cost a fortune. (Are you a beginner? Try this one!)

You will need:
  • A laser print of this template at actual size (no scaling)
  • Letter-sized piece of black card stock
  • Scrap of white card stock
  • Two 1/8 inch thick pop dots
  • Scraps of wool felt in various colors for the flowers (do not use acrylic craft felt!)
  • White pencil or gel pen
  • Black ink pen
  • Tacky Glue®
  • Scraps of freezer paper and a pencil for tracing
  • Small scissors
  • Toothpick
  • Black embroidery thread and a largish embroidery needle

1) Start by cutting the letter-sized black card stock in half so you have two 5.5 x 8.5 inch pieces. Keep one piece and set the other aside for later to make another card.


2) Fold the piece in half so you have a 4.25 x 5.5 inch card.


3) Now's the time to add your haiku on motherhood to the inside of the black card with a white gel pen. Or whatever message you like. Just in case you mess up. Because if you add the message now and mess up, no big deal; you can just use the extra half of the paper to make another card. If you wait and attach the elaborate, gorgeous flowery outside of the card and then mess the inside up you will have a slightly larger problem. Let the ink dry.


4) Write a cursive greeting on the scrap of white card stock with a black ink pen. You can do this. Don't cop out and print it from Microsoft Word. Handwritten is charming! Call up your best penmanship and keep it simple:
"I love you, Mom"
"For my Mom"
"Mummy Dearest"
Something like that. Just write it somewhere on the white card stock with plenty of room around. Practice if you need to.


5) When you are happy with it, use a light table or handy window to center your writing over the rectangle shape on the template and lightly trace the rectangle. Cut out the label and erase any stray pencil marks on the edges. (Or if you have a fancy label punch like mine, center your writing in the window and punch that baby.)


6) Put two pop dots on the back of the white label and place it in the center of your black card.


7) Lay freezer paper (shiny side down) over the template and trace all the flower and leaf shapes separately with a pencil. The shapes are overlapped on the template so be sure to trace the whole shape. Group the traced shapes together according to felt color, leaving a little space in between them for trimming.


8) Cut the freezer paper apart roughly by color grouping. Iron the freezer paper shiny-side-down on the corresponding colors of wool felt scraps. Carefully cut out the felt shapes with small scissors. Leave the freezer paper in place for now, and peel it off as you use each piece. It will help you keep your shapes oriented right side up.


9) Squirt a nickel-sized blob of Tacky Glue on a scrap of paper and use the toothpick to add small dabs of glue to the backs of the flower parts to layer them together. Less is more - it only takes a small dab here and there to adhere the parts. Don't worry about symmetry. It looks better when it's wonky.


10) Use all six strands of embroidery thread to sew a star in the middle of the orange flower as shown. Use one big stitch for each leg. Easy.


11) Test the two largest flowers in place on the card. You may have to trim a bit of the petal from the orange flower if it bumps into your pop dot. Keeping them in place with a finger, lift the edges and add a dab of glue to the middle of the backs with the toothpick. Don't glue the whole shape down. You need the edges loose so you can underlap the other pieces.


12) Now glue on the smaller roses, one underneath and one above the large rose.


13) Add the leaves, putting them in place first and then using small toothpick dabs of glue to secure them. (I use another toothpick that has no glue on it to tuck the ends under where I need to.)


14) You are almost done. Looks pretty nice already, huh? Use a white pencil or gel pen to add two curved lines like this:


15) Now add the last few little leaves to these stems.


16) TADA! A pretty, handmade bouquet of love for your mom and now you are the favorite child and now you have the satisfaction of making something special by hand! If you do make one, I'd love to see it! Share a photo by adding it here.


If you are running low on wool felt you could also make this card with paper flowers instead. Same instructions apply. I have ironed freezer paper on card stock with great success.

Looking for other card crafting ideas that you can use for Mother's Day? Here are some from previous posts:

http://mmmcrafts.blogspot.com/2011/05/make-momma-bird-card-or-two.html

http://mmmcrafts.blogspot.com/2010/11/more-scrap-cards-you-make-one.html
  http://mmmcrafts.blogspot.com/2013/05/made-it-ms-pop-up-flower-card.html

Just a reminder that all of my paper crafts templates are for personal use only. Thanks so much for respecting that.