Showing posts with label paper crafts. Show all posts

Tuesday, September 20, 2016

another paper HST card


This paper HST card is for my beautiful mom! She's a September baby too. Have you guys seen a picture of my Mom?


Here she is with my super cute nephew and her grandbaby, my oldest. I think her inner beauty shines from her face. This lovely, godly and clever lady loves feeding her big family, sewing, soul stirring music, peanut butter and sparkly things. She does not love technology. Or things with motors. I adore you, Moms! Happy birthday from Atlanta!

(HST cards are easy to make with a square punch. See this post for more info.)

Wednesday, September 7, 2016

hst card for Leigh


Handmade happy birthday card for my sister Leigh! It's made of half square triangles because
1) she's a fantastic quilter
2) my gift to her is also quilt themed
3) this just seemed like a fun thing to try in paper, right?


But I found it is totally not fun to make a card like this unless you go buy one of these:


Having a square paper punch makes this card a cinch. I picked this up at Michaels. Don't be fooled by the 1 1/2 inch label there. It punches squares slightly over an inch in size, but the size noted on the punch is measured on the diagonal from corner to corner. Weird. Maybe that's standard but it seems goofy to me. I measure squares along the sides.
So the finished card is 5 x 5 inches.

I planned my colors and then assembled the squares like this: whole square on bottom topped by a triangle, which I cut from the punched squares with scissors, just eyeballing it. Then the assembled HSTs were all glued together on a piece of paper by just lining them up end to end.

I used a Tacky Glue pen for the assembly and it was perfect to put just the right tiny amount of glue on the triangles.


Here's the card with the wrapped gift. It's winging its way to her now so I'll wait a few days to post what's inside the wrapping.

In a completely unrelated K-Drama note, guess what's now streaming on Netflix?


Yaaaaaaaaaay! In the middle of it now!

Wednesday, May 11, 2016

hand stitched flora card


Card for my momma. It probably looks familiar because it's basically my Flora Needle Book cover pattern that I enlarged to 4 x 4.75 inches. It's made from wool felt and embroidery floss on card stock, with a flower in the place of the button that's usually on the needle book.


Closeup of the stitching. I pre-punched my holes with the needle. You kind of have to do that with paper. I punched them through the felt and paper from the top, then proceeded to embroider with a back stitch like usual. The key is to use BIG stitches.


In progress shot of the other card I made for my MIL. I didn't get a final photo of that one! Too last minute. That one had a few beads and sequins too. The process is pretty time consuming for a card, but it turns your card into a little work of art that is pretty gift on its own.

Sunday, December 21, 2014

you + paper + Christmas music


Let the festooning begin! Still time to make some old fashioned Christmas decorations. Put on some Mel Tormé, get out your scissors, pour a cup of hot chocolate and make like Buddy.

Craft Finnish stars and hang them up. They look complex but are easy to make. I made mine last year using this tutorial. I packed them carefully away so I have them hanging up again this year. Last week the girls and I made mini Finnish stars from some sparkly paper for the girls' mini tree toppers (we used 6 inch x 1/2 inch strips). They work well as tree toppers because they just slip over the top spike of the tree, no holder necessary.


Of course you must cut snowflakes and tape them everywhere! They look nice on windows or fluttering from threads. Make a blizzard. Here's my tutorial.


And then make these clever and easy Simple Paper Stars made from origami paper. Add a few hundred paper chains and you are ready for Santa, Buddy style.


And I just saw these lovely paper ornaments from Design & Form. Pretty minimal instructions but you'll be OK. Very simple but nice! I need to make a couple of small paper trees for my mantel and I think I'll use this method.

And you know who has much knowledge about paper Christmas ornaments? Jessica Jones:
How About Orange paper ornaments posts

Just keep scrolling through those blog posts. She also has a great Christmas project Pinterest board going too. No shortage of ideas there. So much papery fun to be had! You may need another cup of cocoa.

Thursday, June 19, 2014

hand cut father's day card


After-the-fact post for this Father's Day card because of course I wait until the very last minute to make cards. It reads Supa Dad...or does it read Supa Bad? You know it, uh huh, rockin your Dockers and cell phone holsta.

Made by hand with an Xacto by printing/sketching on the back of white card stock in reverse then backing it up with blue and chili pepper colored papers.

Thanks so much for all the great feedback on my new Partridge & Pear pattern! I'm looking forward to working on Turtle Dove. But right now I think I might have drafted myself a peplum top that I can actually wear. I need to look into that further.

Thursday, May 8, 2014

make a felt bouquet card for mom


I like to make cards. As well you know. Here's this year's handmade Mother's Day card. It's made of handcut felt flowers and leaves with a paper punch label in the middle.

Would you like to make a similar card? It's a cinch to make if you have some know-how, pretty felt and a little time. I'd say it is intermediate level crafting. Bonus: these flowers won't wilt and they won't cost a fortune. (Are you a beginner? Try this one!)

You will need:
  • A laser print of this template at actual size (no scaling)
  • Letter-sized piece of black card stock
  • Scrap of white card stock
  • Two 1/8 inch thick pop dots
  • Scraps of wool felt in various colors for the flowers (do not use acrylic craft felt!)
  • White pencil or gel pen
  • Black ink pen
  • Tacky Glue®
  • Scraps of freezer paper and a pencil for tracing
  • Small scissors
  • Toothpick
  • Black embroidery thread and a largish embroidery needle

1) Start by cutting the letter-sized black card stock in half so you have two 5.5 x 8.5 inch pieces. Keep one piece and set the other aside for later to make another card.


2) Fold the piece in half so you have a 4.25 x 5.5 inch card.


3) Now's the time to add your haiku on motherhood to the inside of the black card with a white gel pen. Or whatever message you like. Just in case you mess up. Because if you add the message now and mess up, no big deal; you can just use the extra half of the paper to make another card. If you wait and attach the elaborate, gorgeous flowery outside of the card and then mess the inside up you will have a slightly larger problem. Let the ink dry.


4) Write a cursive greeting on the scrap of white card stock with a black ink pen. You can do this. Don't cop out and print it from Microsoft Word. Handwritten is charming! Call up your best penmanship and keep it simple:
"I love you, Mom"
"For my Mom"
"Mummy Dearest"
Something like that. Just write it somewhere on the white card stock with plenty of room around. Practice if you need to.


5) When you are happy with it, use a light table or handy window to center your writing over the rectangle shape on the template and lightly trace the rectangle. Cut out the label and erase any stray pencil marks on the edges. (Or if you have a fancy label punch like mine, center your writing in the window and punch that baby.)


6) Put two pop dots on the back of the white label and place it in the center of your black card.


7) Lay freezer paper (shiny side down) over the template and trace all the flower and leaf shapes separately with a pencil. The shapes are overlapped on the template so be sure to trace the whole shape. Group the traced shapes together according to felt color, leaving a little space in between them for trimming.


8) Cut the freezer paper apart roughly by color grouping. Iron the freezer paper shiny-side-down on the corresponding colors of wool felt scraps. Carefully cut out the felt shapes with small scissors. Leave the freezer paper in place for now, and peel it off as you use each piece. It will help you keep your shapes oriented right side up.


9) Squirt a nickel-sized blob of Tacky Glue on a scrap of paper and use the toothpick to add small dabs of glue to the backs of the flower parts to layer them together. Less is more - it only takes a small dab here and there to adhere the parts. Don't worry about symmetry. It looks better when it's wonky.


10) Use all six strands of embroidery thread to sew a star in the middle of the orange flower as shown. Use one big stitch for each leg. Easy.


11) Test the two largest flowers in place on the card. You may have to trim a bit of the petal from the orange flower if it bumps into your pop dot. Keeping them in place with a finger, lift the edges and add a dab of glue to the middle of the backs with the toothpick. Don't glue the whole shape down. You need the edges loose so you can underlap the other pieces.


12) Now glue on the smaller roses, one underneath and one above the large rose.


13) Add the leaves, putting them in place first and then using small toothpick dabs of glue to secure them. (I use another toothpick that has no glue on it to tuck the ends under where I need to.)


14) You are almost done. Looks pretty nice already, huh? Use a white pencil or gel pen to add two curved lines like this:


15) Now add the last few little leaves to these stems.


16) TADA! A pretty, handmade bouquet of love for your mom and now you are the favorite child and now you have the satisfaction of making something special by hand! If you do make one, I'd love to see it! Share a photo by adding it here.


If you are running low on wool felt you could also make this card with paper flowers instead. Same instructions apply. I have ironed freezer paper on card stock with great success.

Looking for other card crafting ideas that you can use for Mother's Day? Here are some from previous posts:
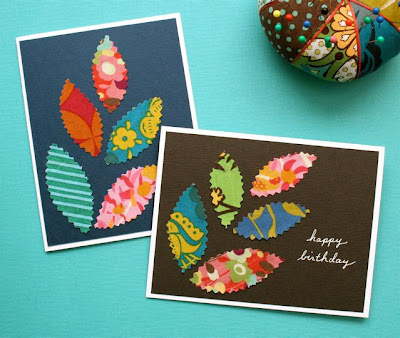
http://mmmcrafts.blogspot.com/2011/05/make-momma-bird-card-or-two.html

http://mmmcrafts.blogspot.com/2010/11/more-scrap-cards-you-make-one.html
  http://mmmcrafts.blogspot.com/2013/05/made-it-ms-pop-up-flower-card.html

Just a reminder that all of my paper crafts templates are for personal use only. Thanks so much for respecting that.

Wednesday, April 2, 2014

mr wormy apple gift tag tutorial


Cute gift tags are fun. Y'all know I love making gift tags that double as cards (like this and this). I'm all about two birds with one stone. This is my latest iteration for kids' gifts, and includes a bonus -- a cute, poseable toy worm to play with after the party is over. Here's a how-to for you.

You'll need:
  • This template
  • Letter sized 8.5 x 11 in. red card stock
  • scraps of green, black and white card stock
  • paper glue and fabric glue (like Fabri-Tac®)
  • a toothpick
  • a standard 1/4 in. hole punch and a 1/8 in. hole punch
  • scissors
  • bone folder or butter knife for scoring
  • two pipe cleaners, one green and one yellow
  • one small green pom and one red mini-pom
  • two 1/4 in. googly eyes
  • piece o' tape
  • gel pen
  • string for tying tag (I like pretty baker's twine)

1) Print the template at actual size (no scaling) on your red card stock. You'll have enough to make two tags. Cut out one rectangle and set the other aside for later. Cut out the leaf template and set aside.


2) Use your bone folder or butter knife to score the fold on the apple card. Fold the rectangle in half and cut the apple shape out, being sure to leave the connected parts uncut so your card will open and close. Then flip it inside out so any stray toner marks will be on the inside.


3) Use the leaf template to trace a leaf on green card stock. Use the bone folder to score a line down the middle. Cut out the leaf and erase any stray pencil marks. Fold it along the score.


4) Use the standard 1/4 in. hole punch to make a nice worm hole in the top apple layer only, as shown.


5) Cut out a small rectangle from black card stock to use as a stem. Glue the stem at a jaunty angle to the back of the apple.


6) Dot a small amount of glue to the bottom corner edge of the leaf and place it as shown.


 7) Use the standard 1/4 in. hold punch to make one circle of white for a nice shiny highlight. Use the toothpick to dot on some paper glue and stick it toward the top right as shown.


8) Now for Mr Wormy. Cut a 5 inch piece from both pipe cleaners. Set the extra pieces aside to make another Mr Wormy later. Twist the pipe cleaners together to create a stripey body. On the tail end, fold over the very ends and crimp firmly so they will stay wound together and there will be no sharp wires poking out.


9) Add a nice dot of fabric glue to the green pom and stick the sharp ends of the worm neck inside the pom through the glue. Hold in place for a minute so it will set.


10) Use a toothpick to add dots of fabric glue to the other side of the pom so you can attach the red mini-pom nose and the two googly eyes. I like to say googly eyes. Googly eyes!


11)  Now's the time to write a name on the outside of the card and a greeting on the inside. I like to use a white gel pen. It looks nice.

12) Punch a 1/8 in. hole in the top of the stem for the baker's twine or string.


13) Feed the tail end of Mr Wormy through the worm hole until you have just the right amount showing outside the card. Have fun bending his head into a charming angle. Tape the end of the worm to the inside of the card so he stays in place until the gift giving is over.


That's it! All that's left is to tie your awesome, handmade, googly-eyed Mr Wormy gift tag to your present and congratulate yourself on saving a trip to the card store. (high five self)