Showing posts with label tutorial. Show all posts

Wednesday, December 6, 2023

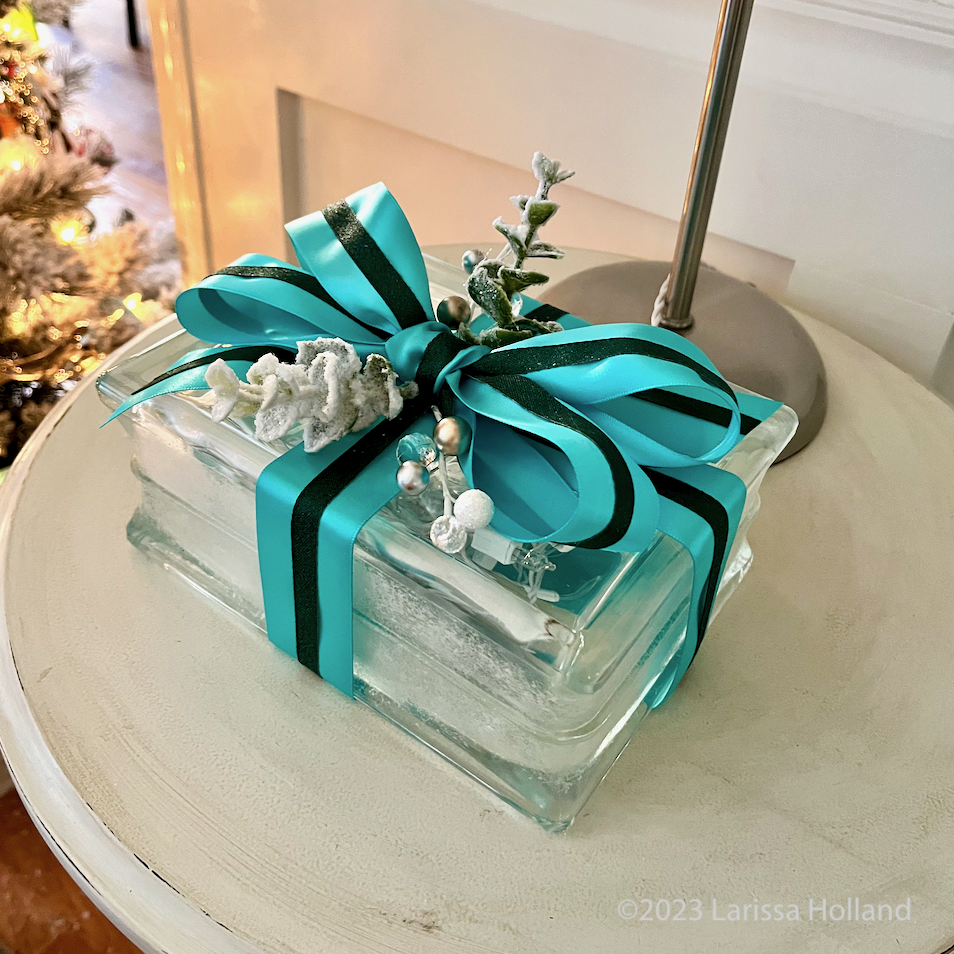
make lighted glass block Christmas presents


Have you guys ever done this Christmas craft? It's pretty easy and I love the way the lighted presents add festive magic to tabletops and bathrooms. Anyone who can tie a bow and use a hot glue gun can do this craft. My sister Leigh had a Christmas craft party years ago and we made them. I got the big idea a couple years ago to repeat that party with my own friends and I planned it all and bought the supplies and then ended up getting sick and not being able to attend my own craft party. But my friends had a blast making them.


WHAT YOU NEED:

  • Glass brick with a hole in the side to feed in a string of lights. Back in the day you had to purchase the bricks from your local Home Depot or Lowes and make the hole yourself using a drill bit for glass. Forget that! Craft stores have clued into this and nowadays you can usually find glass bricks in various sizes with handy premade holes available at your local craft/fabric superstore. 
  • If your brick is clear and not frosted you will want to frost just the sides (not the top or bottom) with a spray paint designed to look like frosted glass. That's at the craft store too.
  • A string of lights to put inside. Battery powered or electric, depending on whether you have an outlet handy where you want to put the finished present. Just make sure the wires are either white or metallic. The green wired kind won't look as nice. I think warm white lights look best. 
  • Wired ribbon to make the bow. It's also nice to glue on some festive berries, pine cones, or greenery if you like. If you make your bows using a bowmaker jig, you may need some thin wire or twist ties to secure the loops. You can also use non-wired ribbon (I did on one because I loved the color) but wired ribbon gives nicer results and you can fluff it up after storage.
  • Fray Check to keep the cut ends of the bow from raveling
  • A hot glue gun
  • A frothy coffee (optional)


TO MAKE:

1) Frost the sides (not the top or bottom) of your glass brick using the frosted glass spray paint and let that dry. (I won't attempt to tell you how to drill a hole in a glass brick since I've never done that, so I'll assume you can purchase a brick with nice big hole in back from your craft store.)

2) Feed in your string of lights, leaving the electric plug or battery pack on the outside of the brick. The hole/plug will be in the back. 

3) Measure and cut lengths of wired ribbon to wrap around the center of your brick in both directions, being sure to neatly overlap and hot glue the ribbon to the center top of the brick and not the bottom (so it can sit flat). Don't worry, your big ol' bow will cover the overlaps.

4) Make a big ol' bow with your wired ribbon. (Bow tutorials abound online.) A classic bow or a fancier one with more loops are both fine, just be sure it's big enough to cover most of the top of the brick. It's a nice touch to angle or notch the ends of the bow. Use Fray Check on the cut ends to keep them looking nice. 

5) Hot glue the bow in place in the center on top along with any little embellishments you want to add, like berries, greenery, sparkly bits, etc.

Tada. You're done! Plug it in or turn on the battery pack and enjoy. Makes a nice gift too! 

Tuesday, April 20, 2021

helpful tips for nicely done ornament heads – you can do this – no really


Let's put our heads together! haha. Do you find that you are intimidated by the idea of making the tiny wood bead heads for some of my heirloom ornaments? This is the post for you. I'm going to break this process down to hopefully digestible little bites, and you will realize this is not a big deal at all. No lie. You can do it. *high fives* *down low* (whips hands away) *too slow!* 
OK, here we go:


FIRST: BUY THE RIGHT BEADS

My patterns usually call for 20 mm (3/4 inch) wood beads. It's important to get the correct size so that the heads look in proportion to the bodies, and so that the tiny hats/hair/noses/mustaches etc... all end up fitting the way they are designed to. 


There are tiny variances in sizes even if they are labeled 20 mm or 3/4 inch, but you don't want to stray too far in either direction. To test for yourself, cut a skinny strip of paper and mark 20 mm or .75 inch on it using a ruler and a fine point pen. Then feed the strip of paper through the bead hole and check. The bead should be fairly close to your measurement.


When buying, look for:

  • hardwood beads that have a nice, uniform, woody color and subtle graining
  • consistent size and roundness
  • drilled holes that are around 4 mm
Avoid purchasing beads that:

  • are very light colored, as they seem to be softer/more prone to bleeding, wonkier shaped, and there's not much contrast if your head will have white hair
  • have holes that are too large or too small (around 4 mm is good)
  • are not consistently round and look tall or squatty


Are you planning to add a different skin tone to your beads? 
I recommend painting the whole bead ahead of time (plus the smaller beads for hands if needed) with a good quality watercolor paint and a large-ish brush. Using semi-transparent mediums like watercolor will keep the nice, matte finish of the wood bead, and the color will have some depth.

In the photo above^ the top and righthand beads are painted with washes of watercolor. The bottom left is unpainted. If you find it hard to get uniform color using watercolor, try adding more than one coat of diluted color and using a larger brush.

Of course, you can also use acrylic paint if you prefer that, but be aware that it will add a slight sheen and the color will be more opaque/flat. I do love to use acrylic paint to fill in white hair, as shown on the Mrs Santa head in the photo above.

Confession: I could not find my good watercolor set to make these (I suspect the children). All I could find was the ancient, cheap tray of Crayola watercolors we picked up from Target when they were small. It took some mixing and experimentation to get the colors I wanted, but I'm just saying it's possible if that is all you have handy. The super cool thing is, I have noticed the watercolor wash seems to partially seal the wood so that it is way less prone to bleeding and it's easier to add the faces. Bonus! Note: It's important to let the bead dry completely before adding the features.


SECOND: HAVE THE RIGHT TOOLS


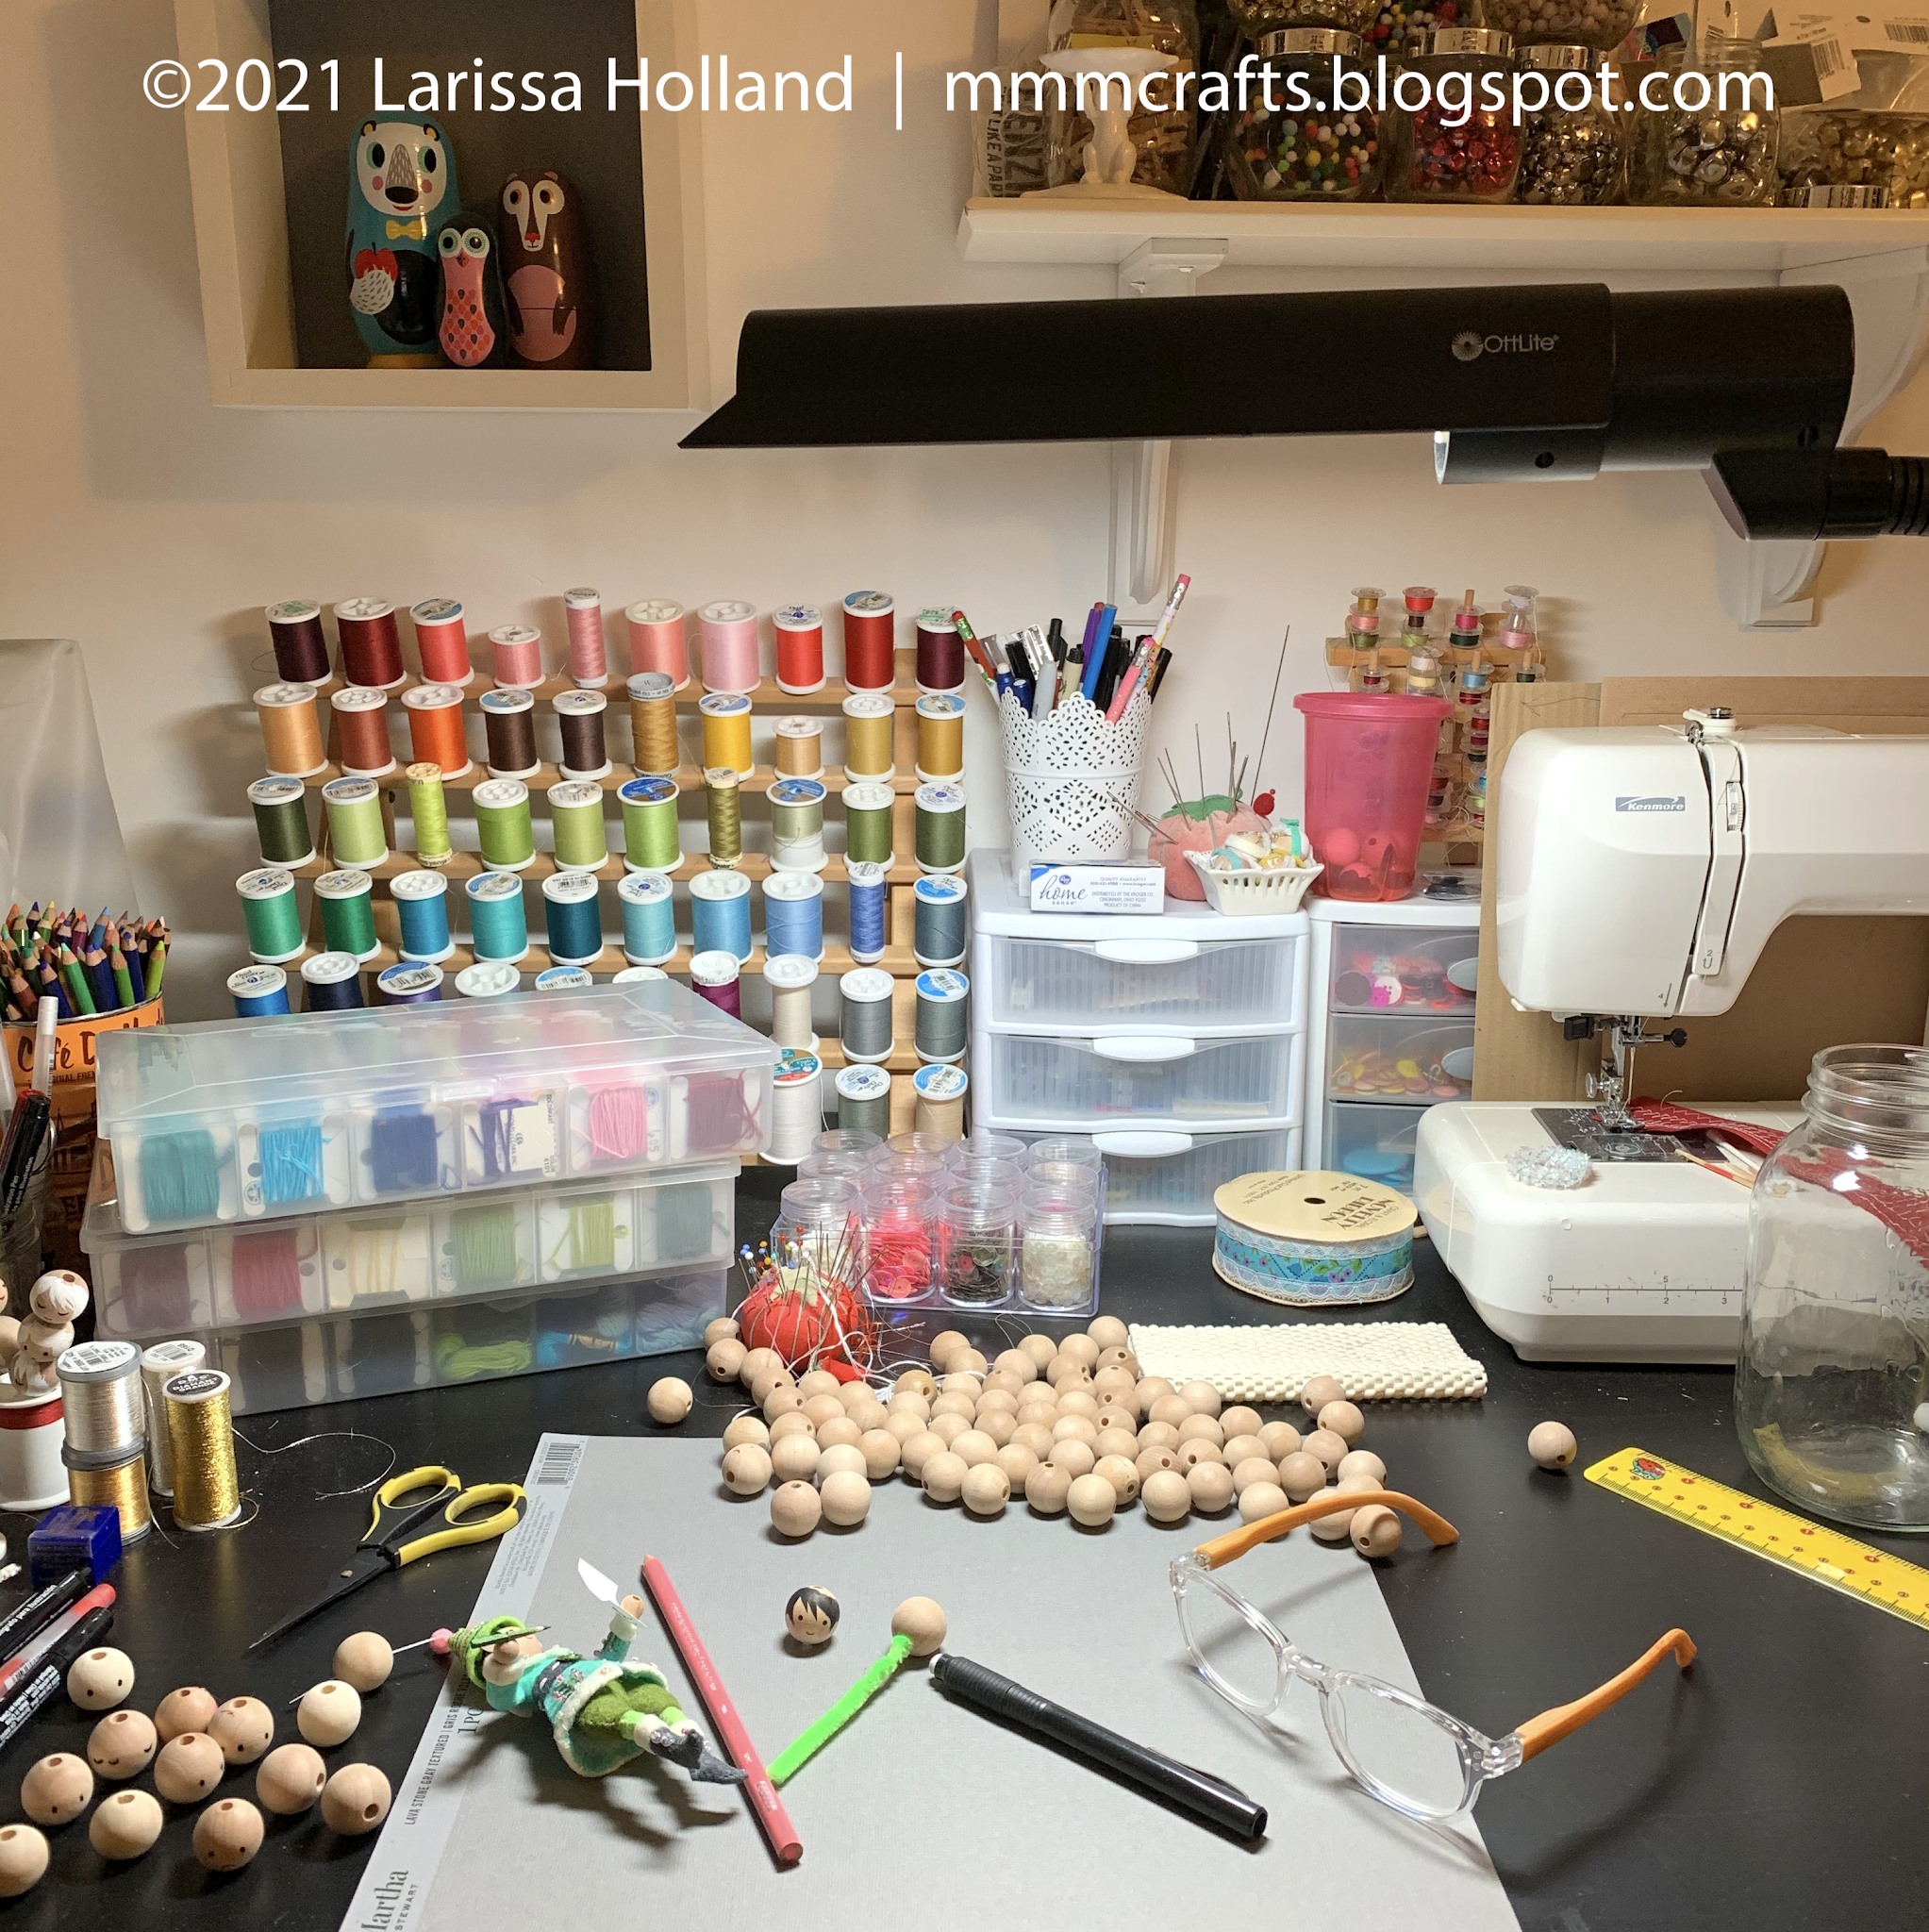
1) Good lighting and reading glasses: OK, some of you young thangs with sharp eyes may not need the glasses, but they are a must for me at this small scale. I have an OttLite directly over my work space and also a nice big window near my desk. This shot of my desk is at night, so you can see the OttLite still gives plenty of light, even without the window.


2) Pencil: One with a nice, fine point. Mechanical pencils have a consistently sharp tip.


3) A good eraser: I like white eraser pens rather than the old school pink eraser on the end of the pencil, which can leave marks/smears. These click-up type eraser pens do an excellent job of getting rid of stray pencil marks (after your head is dry) without leaving residue or smears.


4) Fine point pens: My instructions call for you to use either a good quality gel pen or a fine point permanent fabric marker to draw on the eyes, mouths, and hair outline. It's tempting to use that Sharpie marker or your kid's felt marker because they are at hand, but don't do it! Why? Because unfinished wood beads tend to bleed inks along the wood grain, and fabric markers and gel pens are great at minimizing this unattractive effect.

(I've also heard some folks get good results from Sakura Micron fine tip pens, so you are welcome to try that too! If you have extra beads on hand you can afford to test some different pens, but be sure they don't bleed and have permanent ink.)

Please note: If the unfinished wood makes you nervous or if you just can't seem to minimize the bleeding there are other options:
  • Don't use markers/pens. It's perfectly fine to use colored pencils to draw on the face. It's a softer look but more forgiving than the pens if you do not have a steady hand.
  • Or you can opt to seal the entire bead with a clear coating like matte Mod Podge before adding the face/hair. I don't prefer this because even the matte coating can be a bit shinier than I like, but it's a surefire way to avoid bleeding. If you do this, don't use a gel or fabric pen – use a permanent marker like a Micron or a Sharpie. 
  • Or you can opt for a Waldorf look by simply leaving the faces entirely blank, or with only some rosy cheeks and hair. I've seen lovely sets done this way.


5) Broad tip fabric marker: In some cases, it's helpful to have a broad tip fabric marker to fill in the hair after you get the outline done with the fine point pen. It's just quicker than coloring with the fine tip. On heads with white hair, you can use an opaque white paint pen to fill in, or brush on white acrylic paint.


6) Good quality colored pencils and a Q-Tip to blend: to add details like rosy cheeks, red noses, and ghostly hollowed cheeks. I remember I had a rolled paper blending pencil shaped thingy a hundred years ago from my college charcoal drawing classes that would probably work great for the cheek blending instead of using a Q-Tip, but I can't find it in my stuff. (Yes, I do still have my art supplies from college, don't you?) But Q-Tips do the job and everyone has 'em.


7) Tacky Glue and a toothpick: On some heads you need to glue on tiny noses, ears or mustaches. Tacky Glue does the job nicely because you need to use so little to make a bond. The toothpick comes in handy to place teeny tiny amounts of glue just where you need it.


8) Folded chenille stem, pipe cleaner, or skinny dowel: Use these to hold the bead more easily while you work with it, and when you're finished you can just prop the stem in a thread spool or handy cup to let the head dry.


9) Extra beads: Understand that you may need a few extra beads if something goes awry. What you don't need is the added pressure of nailing this in one try. (Shall I show you my impressive reject pile of heads?) If you don't like your first face, most times you can attempt another face on the opposite side of the bead, provided the first face will be covered by hair or a hat.

10) And finally, CONFIDENCE. Have a close look at some of my photos in this post. You'll notice my faces are, in fact, not perfect. They are a bit flawed, but hopefully still charming. (Kind of like me.) In short, you got this. Tackle this part of the ornament project in the same methodical way you do the embroidery and sewing portions – it's no different. Just follow the step by step instructions and you can have a winsome little face you are delighted with. Really.


THIRD: LET'S MAKE A SAMPLE HEAD

I'm going to show you how to do a basic face here, but please follow the specific instructions included in my patterns for your ornament. There are variations with each pattern.

1) Look at your bead. Is there a larger hole on one end? That's the neck. (If the holes are the same size, no worries, use either.) Skewer the bead on a folded chenille stem. Like my fuzzy green one? It's been around. 

 
Just a note here: I've noticed some of the wood beads I've bought lately have holes that are on the small side (less than 4 mm). If you do too, just keep that in mind when you cut your felt body out and maybe trim a tiny bit off the width of your neck to accomodate. You can also trim the fuzz on the pipe cleaner neckbone to reduce bulk and make it easier to slide on the head later. What if you've already sewn the neck? If the fit is too snug, my favorite trick is to wrap the neck tightly with matching sewing thread. It really helps to get it in the bead hole when it's a bit too tight. Remember to twist the head on and not shove.

2) Turn the bead so the stripey end grain will be the face. (This side tends to bleed less, unless your bead is painted, in which case you can use any side you like.) If there are obvious flaws or burn marks on the bead, you'll want to turn that toward the back or choose a different bead. Find the halfway point and mark it lightly with a pencil if you need to. Folks tend to place the eyes too high, and that will help. The eyes should go at the halfway point, where the bead is the widest.


3) With your pencil, lightly mark two eyes and a mouth. As a general rule, my eye dots are about 3/8 inch (9 mm) apart from center to center, with some small variations. Place the mouth about halfway between the eyes and the neck, centered between the eyes. Err on the small side for the mouth. It's cuter. The eyes and mouth will visually form a squatty triangle. (If you like a more kawaii look for your faces, place the mouth a little higher and closer to the eyes, but keep it just as small or smaller. It will increase the cute factor, and conversely, placing the mouth lower will decrease the cute factor.

Not quite happy with your sketched face? Simply erase and make adjustments. Do this before you move on.


4) Now to dot your eyes. haha. Use a permanent fabric marker or gel pen to color two dots for eyes over your pencil marks. The larger the dots, the cuter the look. I keep the dots about 2 mm, give or take. Experiment to find the size you like. Remember: you can always make them larger but you can't make them smaller, so be conservative.


5) Use a permanent fabric marker or gel pen to draw on the mouth over your pencil mark. A fine point is essential here – it's very easy to make the mouth too large for the scale of the face. Think thin and small.  You can always dot on more if it's too small. Don't worry if you don't completely cover your pencil mark. You'll erase it later. DON'T erase until you are sure your head is dry.


6) Your pattern may call for adding rosy cheeks (or ghostly cheeks). Do not add cheeks until your face is dry. Here's how: Grab a good quality colored pencil. (No crayons or markers please.) Using a circular motion, lightly color a circle just under each eye and close to the mouth. Smaller circles = more kawaii. Larger circles = more vintage. Use a Q-tip or a folded cotton pipe cleaner in a circular motion to soften the edges of the circle, if you like. You can go back in and darken the center of the circle if you want a deeper color.


7) Add some hair. Sketch in the outline lightly first with pencil, then follow with a fine point fabric marker or gel pen to outline. Then fill in with either the fine point pen or the broad tip marker or paint pen you have handy. 

Note: The hairstyle can be as simple or fancy as you like. Start simple, and get fancy later when you gain some confidence. This sample hair above^ is more on the complex side. It's for Little Elves. Here's a simpler style for Mrs Claus


Really, the key to the hair is getting it fairly close to the eyes, so that the face of the bead looks smallish, cute, and surrounded by hair, and does not look like it's a tiny face island in the middle of a big blank wood ocean. Check my pattern directions for how much of the sides and back of the head you are supposed to color. It could be just a partial since a lot of them are wearing hats.


8) When your face/hair are totally completely and utterly dry, you can safely erase any stray pencil marks. Be aware the eraser will also unfortunately erase your rosy cheeks, so you may need to touch those up. Finished! Tada!


Still nervous? You can always simplify the faces if they seem too complex. For instance, the two Mrs. Santa heads on a pike above. The top one is a more complex one with fancier hair, and the bottom one is a simpler version with just dots. I think both faces are so cute! So you won't lose any style points for going simple. As a bonus, the dotted faces evoke a more vintage look, which I always love. 

So that is how it's done, lovely mmmakers. You have faced your fears. *wink* After following this tutorial you'll be ahead of the game. haha. OK sorry, I'm finally out of puns. There are a lot of variations in the faces and hair between my designs, but each of the patterns includes detailed step-by-step instructions for the faces. Use the tips you learned here to help you along. 

I hope this tutorial has been helpful! Happy mmmaking! 

Thursday, October 15, 2020

the skinny on metallic thread and flosses

I specify several different kinds of metallic thread/flosses in my Christmas ornament patterns. Because of their shiny wrapping, metallic threads can be more of a challenge to work with, but they are so worth it. This post will show you why I use so many different kinds and what they do best! 

1) For embroidery only (not to attach beads/sequins): 
DMC DIAMANT and DIAMANT GRANDE 


This lovely metallic embroidery thread was a recent discovery for me. I had been using the six-strand DMC Light Effects for embroidery and stripping it like I do the DMC six-strand cotton flosses, which was a bit difficult/frustrating. I much prefer the Diamant because:

  • It's a single twisted strand (no stripping required)
  • Easier to thread in your embroidery needle
  • Doesn't bunch or tangle as much  

I use it in place of six-strand floss for any metallic decorative embroidery.*  To sub Diamant for the six-strand cotton flosses in my instructions, ignore the number of strands I have specified. Substitute a double strand of Diamant or a single strand of Diamant Grande. That formula should work well most of the time. If you want an especially thick looking metallic embroidery, try a double strand of the Diamant Grande.

*Don't make the common mistake of using Diamant to sew on beads/sequins. It is too thick and will make you crazy and/or miserable. Use metallic sewing thread for that, like Coats & Clark. See further down the post.

Copper Diamant thread in action on a Mr. Marley ornament

Where to get it: DMC.com of course, and Benzie Design is planning to include it as an option in their kits. I have also seen it stocked at some local sewing/craft big box stores, but not all. 


2) For tassels (and in a pinch, for embroidery): 
DMC LIGHT EFFECTS

Light Effects is the metallic/shiny polyester equivalent to DMC's six-strand cotton flosses. I have found them a bit challenging to embroider with, but they are certainly lovely looking. If you do use them for embroidery, try using shorter lengths, like twelve inches or less. Once cut, the strands spring apart, which makes it challenging to thread several strands at once. I ended up just threading them in stages.

I use it to make tiny metallic tassels, like the ones on Mr. Scrooge's night cap or Mr. Marley's boots. When doubled, it's the perfect tassel thickness and so pretty and shiny. I do not use it for embroidery now that I have Diamant, but you certainly can! Just strip the same number of strands specified in my instructions, use short lengths, and take your time.

The tassels and metallic embroidery shown above are Light Effects

Where to get it: I have no problem finding a range of these flosses at my local sewing/craft stores. DMC.com also, of course, and Benzie Design includes Light Effects in their kits.


3) For attaching beads/sequins: 
COATS & CLARK METALLIC SEWING THREAD

I'm not married to this particular brand of metallic thread, it's just the one that is readily available at my local sewing/craft store and is the only one I've used so far. You can find it in the display of sewing thread spools. Any brand of metallic sewing thread should be fine, and this Sulky one looks nice too. Maybe I should try it.

I use it to sew on beads and sequins. It's very easy to thread because the strand is so slender, and has the advantage of adding a tiny bit of sparkle (more sparkle = better). There's no need to worry about matching the color of the thread to your beads and sequins, which is especially nice when you are using a lot of different colors. It can be more temperamental to work with than non-metallic sewing threads. A good bit more snarly and twisty, so use short lengths.

The sequins and beads on this Mrs. Claus are sewn on with silver sewing thread.

Where to get it: I have no problem finding a range of these at my local sewing/craft stores in the sewing thread display, or online at major sewing stores


3) For hanging loops: 
DMC METALLIC PEARL COTTON

Pardon this untidy shot of my metallic pearl spaghetti instead of the neat twisted skeins they were when purchased. #studiolife. You might be saying, what can she possibly need yet another metallic floss for? Well, I'll tell ya:

I use it to make the hanging loops for all my ornaments. This nicely twisted pearl floss just makes a better looking loop. It's also much easier to knot around itself because it doesn't disintegrate into unmanageable separate strands like Light Effects does. Which also makes it easier to thread through jump rings, if you prefer to use those.

The hanging loops on most all of my ornaments are made with Metallic Pearl Cotton

Where to get it: I have no problem finding both silver and gold pearl floss at my local sewing/craft stores or online at major sewing stores. Benzie also includes this in their kits! 

And that's the lowdown on the metallic threads I use. I hope this was helpful! 

Wednesday, June 20, 2018

Hey, Larissa, what do you mean by "4 strands of floss"?


If you are working on any of my hand embroidered projects, you'll notice that I specify how many strands of floss to use on each step. If you are new to embroidery, you may be wondering what that means. Wonder no more!

DMC embroidery floss is made up of six cotton threads that are twisted together to form a rope of floss. On my patterns you will find the number of strands specified, for instance:

4 strands of contrasting floss + whipstitch

That means you'll remove 2 strands of floss and use the remaining 4 strands of floss to do the whip stitches. Pull the group of 4 strands a few inches through the eye of the embroidery needle so that it doesn't slip out as you sew. Leave that end loose, then knot the other end. When you stitch, your stitches will be made up of 4 strands each (in other words, do not double the floss).

(Note: "Contrasting" up there just means a floss color that is not the same color as the felt so it will show up well. By the same token if it says "Matching" you would use floss which is the same color as the felt you are sewing.) 

It's important to use the correct number of strands if you want your embroidery to have the same look as my samples because I obsess over tailor the number of strands used to best fit my designs.

You'll find I use 4 strands the most, but I also specify 2, 3, and 6 strands a good bit. I don't recall ever specifying 5, but it's a possibility! It's a good idea to set aside the strands you peel away so you can combine them and use them later.


Q: So what's the best method to separate the strands? 
A: You'll find if you just grab 2 strands and try to peel them away the floss sometimes gets snarled or twisted. Who has time or patience for that? Not me.

Start with about 18-20 inches of floss. (Avoid cutting strands much longer because this process just gets too tricky.) First I'll tell you about the DMC recommended method. And then I'll tell you mine.

DMC approved method: Pinch the floss between your fingers near the end and slowly pull out one strand at a time, until it's all separated, then reunite however many strands to thread your needle. This has the advantage of removing any twisting and will keep your embroidery smoother and less snarly. Here's an excellent visual tutorial for that method:
https://www.needlenthread.com/2013/08/embroidery-tip-how-to-separate-floss.html

Larissa's quicker method: My non-DMC approved method is to hold one end of the floss in my teeth and at the other end grab two threads with one hand and four with the other. I peel them apart that way to keep the floss from twisting/knotting on itself. Then I run my pinched fingernails down the strands a few times to untwist them. Voila. There still might be an occasional twist in the floss, but I usually don't sweat that.


Q: What needle should I use? 
A: Most of my patterns specify a size 5 embroidery needle (also called crewel needles). If that's the only size you have, you can do most all of the embroidery with it. However, it will make your job easier and your fingers happier if you have a variety of needle sizes at hand. Also having multiple size 5 embroidery needles is a great idea so you don't have to unthread every time you change a color. 
Make sure your needles are good and sharp. (Avoid tapestry needles. While they have nice, big eyes, they also have blunt tips. Chenille needles have sharp tips and long eyes, but be aware their sizing numbers are completely different for whatever reason!)
  • I use a size 5 embroidery needle for 3 and 4 strands of floss.
  • I use a smaller sized regular hand sewing sharp for 2 strands (or you can use a size 8 or 9 embroidery needle).
  • I use a larger size 3 embroidery needle for handling all 6 strands or anytime I'm making a French knot with 4+ strands. The larger eye and needle shaft make it easier to pull French knots through.
  • I use a small, slender sewing sharp for sewing on seed beads and sequins. A beading needle is also great for that, but I prefer a sewing sharp because they are just easier to thread. (Disclaimer: I do sometimes run into seed beads that will not fit over my tiny sewing sharp, so if you use a beading needle you will not have that issue.)
DMC also has a needle guide here


Q: I hate stripping floss. Can I just use different sizes of DMC Pearl Cotton?
A: In theory, yes. Yes, you can. I have no experience with it because Pearl cotton only comes in limited colors at my local store, but I don't see why not. DMC Pearl cotton comes in several widths.

Cheater Note:
After the embroidery's all done and you sew the ornament parts together, I specify 2 strands of matching floss for that. BUT. You can cheat. If you have a large library of sewing threads like I do, and they just happen to match the felt color, then feel free to use a doubled strand of sewing thread for that instead. (Remember this is for sewing the parts together only – not for embroidery.) It's way less trouble than stripping more floss. BUT. It is less likely you'll find a matching sewing thread for every felt you have because they come in fewer colors. I just use it if I have the matching thread. And, yes, I have plenty of samples that are sewn together with both – 2 strands of floss and doubled thread. It's hard to tell unless you really look closely!

I hope this guide has been helpful! Happy stitching!

Thursday, May 7, 2015

quick tiered skirt tutorial for preteens


You'll need:

A girl that is 10-13 yrs old and sized more or less like my kids. haha. My two girls are 21 months apart but right now they wear the same size of clothes. They are both taller than average and usually wear a 12/14 in girls clothing (and sometimes a 16). I made the gray Washi skirt slightly longer than the navy original since they are both growing at an astonishing rate right now.


This is an elastic waist skirt, so it's pretty forgiving and there's room to adjust the waist a few inches either way.


If your kid is a much bigger or smaller than mine you may need to adjust widths and lengths before you begin.

Pondering? Measure your kid's:
1) waist (wherever they wear their skirts)
2) length from their waist to their knee.
This will give you an idea if this skirt will work for your kid as is.
Or if you are a petite mom, this skirt may work really well for you!

Finished size: 
This skirt is about 21 inches long from waist to hem. The waist on ours is about 30 inches around and is meant to be worn low, just below the belly button (you can adjust the waist size below and of course you can adjust the hem).

That's how both my girls wear everything, slung low.


Materials:
  1. About 1.5 yards of medium weight cotton or chambray.
  2. A package of 1 7/8 inch wide bias hem facing. Mine is Wright's brand. This makes for a really easy channel for the elastic and adds a nice contrast of color inside the waist. (If you don't want to buy hem tape you can use a wide grosgrain ribbon.
  3. A length of 1.5 inch wide elastic for the waistband that is long enough for your kid. In my case, that was 30 inches.
  4. A ruffler for your machine.
Rip the fabric pieces:

Don't be afraid to rip! It's so much faster than cutting and you can count on it being on the grain and straight. And it's OK if your yardage is wrinkly. Rip first and press later! See, I'm already saving you gobs of time.

First true up the top edge. Cut a 1 inch slit in the selvedge side close to the top of the fabric. Snip it straight across the selvedge and then use your hands to continue ripping the fabric all the way across. I pause at the end (which is the opposite selvedge) and then I snip the that last little bit with scissors to keep from tugging it too hard. Discard what you ripped off. Now you have a straight top edge to measure the rest from.


Rip the following pieces for the skirt by measuring along the selvedge and clipping a slit through it, same as you did above. Measure one, clip, rip. Then measure the next one.
Press all the ripped pieces and whack off the selvedge edges. (Which has the added advantage of squaring up the ends. They can look a bit wonky from the ripping.)

FOR ALL THE SEWING: Use 1/2 inch seam allowances.
RST = Right Sides Together

Make the waistband.

1) Shorten the ripped 7 inch waistband piece to your kid's waist measurement plus about 8 inches. Mine was 38 inches total. Cut a piece of hem tape to the same length.


2) Sew the short ends of the waistband fabric RST (right sides together) to form a loop. Finish and press the seam.


3) Press 1/2 inch toward the wrong side along the top edge.


4) Press under 3/8 inch of the bias hem tape on both ends. Starting to the right of the waistband seam, pin it all the way around about 1/16 inch down from the top edge. The ends should meet and overlap just a tad. Edgestitch the hem tape in place on top and bottom. When you finish you'll have a slit for the elastic where the hem tape meets. Tada.


Make the tiers.

5) Did you already cut one of your 8 inch pieces in half? Good. Throw one of the halves in your scrap pile. Sew the other one RST to the full length 8 inch piece on the short side. Finish and press the seam.


6) Sew the two 10 inch pieces RST on the short side. Finish and press the seam.


7) Break out the ruffler. Set it to one tuck every 12 stitches. Stitch length should be 2 or 2.5.  If your child's waist measurement is larger than my kid's, go with 2.5.

8) Ruffle both the tiers along the top edge with a slightly less than 1/2 inch allowance. Clackety clackety clack. ALERT: Be sure to check that your needle is screwed in tight every few tucks. The ruffler might be busy trying to loosen your needle as it goes along. It's a bummer when you have to stop and screw the needle back in while your ruffler tries to look all innocent.


9) Press the ruffles nice and flat.

10) Now sew the two tiers together RST. The ruffled edge of the longer tier goes face to face with the UNRUFFLED edge of the shorter tier. Those sides should be somewhere near the same length, give or take a few inches. Pin them starting at the midpoints. Sew the seam. Finish and press the seam.


11) Now trim the sides flush. Just follow the line of the shortest tier on both sides.


12) Lay the waistband loop flat on a table. Fold the skirt tiers in half, wrong side out, and line them up to the bottom of the waistband as straight as you can. Measure how much you need to cut off of the skirt in order for it to match up to the waistband but don't forget to keep an extra half inch for the seam. If you need to, err a bit on the large side. You can always ease it in. Trim it!


13) Pin that seam together and sew RST. Finish and press the seam.


14) Pin and sew the tiers RST to the waistband. To do this, turn the waistband right side out and upside down. Turn the skirt wrong side out and tuck the waistband down inside the top, lining up the raw edges. I like to put the vertical waistband seam in the center back and line up the skirt seam on the side.


15) Pin the front, back and sides, evenly distributing the fabric. Finish pinning well and sew. Finish and press the seam.


16) Feed the elastic through the waistband with a bodkin or a hugemongous safety pin. Overlap the ends of the elastic by about an inch and secure it with a (normal sized) safety pin. Don't bother tucking the ends inside yet.


17) Now's the time to check the fit on your kid and also the length. Call them imperiously to you and tell them to drop their shorts. Haha. If they complain about trying it on, make them stand there longer than is strictly necessary while you pretend to dither about the length of the hem.*
*Parenting styles may vary.

18) If the fitting was great, sew as is. If you need to adjust the waist elastic, do that now.

19) Sew the overlapped ends of the elastic together. Pull it inside the waistband by stretching out the waistband. Pop! It disappears inside.

20) Zig zag stitch over the hem tape slit to close.


21) Hem the skirt 1 inch with a double fold 1/2 inch hem. (Or a different amount depending on your kid.) To do that, press 1 inch over to the wrong side, then fold it under itself and press. Edgestitch and you are done! Yay!


I hope you enjoyed this tutorial! I made these two skirts in two afternoons, kind of working on them here and there.


My girls love these skirts. And each other. Deep, deep inside.


I need to make them one in plain chambray because that is such a versatile fabric. I might even take a crack at making myself one. No reason you can't make an adult-sized tiered skirt for yourself. Just make adjustments for your waist size and skirt length and use the same process. You'll probably need to use a longer stitch length for the ruffler. Love to see what you make!