Monday, June 30, 2014

big plans and apathy do not mesh well


I fell victim to the absolute charm of this Miss Dandelion Doe from Alicia Paulson a few weeks ago and have been meaning to get started on the kit. Eeeee! So adorable.


Look and see the different animals she has. The mouse's moccasins! Aw. Since getting the kit in the mail I've been staring at the pretty pieces of felt and Liberty lawn bits and imagining how cute mine will turn out to be, but somehow I've never started it.

So I took the kit with me to Huntsville last week because we were there visiting my mom and I would have plenty of time to make make make. As I packed the kit I was so filled with pie-in-the-sky sewing ambition that I also bundled up my sewing machine and enough fabric and patterns and notions to also make three tops. Somehow after I got settled at my mom's all I did in my spare time was watch Roswell episodes and eat doughnuts. To be honest I felt a little lackluster and depressed. My girls did have an excellent week at Jordan Park VBS. After five mornings spent there, lunch dates with my sisters and round robin dinners from house to house all I wanted to do in my down time was veg. Not make. I did manage to cut out a few pieces of the felt and adjust the placement of the buttons on my Washi peplum top. And that was it. Oh, and I did work off the doughnuts. At the 5:30 class. Yes, that's A.M. I'm not sure what came over me. It was a weird week.


And now I have to unpack all the sewing stuff I didn't touch in Huntsville. I hate unpacking. I hope you are having a more productive week!

Monday, June 23, 2014

washi based peplum top


I've had a peplum top living in my brain for a couple of years now and it needed to happen. I've probably missed the boat on this trend, but I still like peplums.


Even though I haven't successfully sewn a Washi dress for me (totally due to lack of follow-through with fit issues on my part, and not because the pattern is less than awesome, which anyone on the planet can already tell you) I started with the Washi bodice because that part fit me so well when I drafted one a while back. I added a couple inches to the waist length and changed the side seam angle. I made a back for it starting with the Washi back but with several mods, including taking out width and changing the angle of the sides to straight because I wasn't planning on putting any shirring back there. 


The real guesswork came when I drafted the peplum. I just took a wild stab at the curve and length (in my case, ten inches from high waist) and crossed my fingers. Here's what I ended up with for the front (top) and the back (bottom).


The first muslin came out pretty well but needed some tweaks, so the top you see in the photos is the second iteration of the drafted pattern. It still has some minor fit issues and I'm not sure I chose a good print -- too loud, you think? It's a really nice AMH linen blend that has a lot of body.


Ok, the buttons in the back. It needed some width taken out of the back to look more fitted but I didn't want to take it in or add darts because I love that I can pull this top over my head with no closures needed. I tried adding some elastic in the mid back and wasn't crazy about it. Sooo I decided to add two buttons and elastic loops to create pleats in the back once it I got it on. It works pretty well, but next time I will move the buttons a bit more toward the back.
 

I used the Grainline method of bias binding for the neck and armholes and it was worth it as usual but it pretty much doubles the time it takes to make the top. I could try facings next time but I'm not too fond of blind hemming those by hand. I should add here that I do not sew the binding together at the ends to create a loop like on her tutorial. That's too much bother when I don't know the length of the binding I need.

I just start with a piece that I'm sure is long enough, fold over the end to start, sew it round and then trim it when I come to the end. Then to recreate the shortening effect I overlap the raw edges of the binding at an angle and sew them to secure before I go on. That's as clear as mud, isn't it? Sorry. I think the point is that the binding has to be ever so slightly shorter around than the armhole in order to lay nice and flat.


As far as construction goes, I sewed the darts first then added the peplum pieces on the front and back bodice. I centered the peplum on the bodice before I sewed so I could trim it if it was slightly too wide (which it was). Then I sewed the side and shoulder seams and all that was left to do was the binding and narrow hem. And of course the buttons. Not too tricky.

Overall I'm pretty pleased with how it came out and I'm looking to make another one with tweaks this week. I'm thinking maaaaaybe some double gauze or Liberty that is in my stash.

Thursday, June 19, 2014

hand cut father's day card


After-the-fact post for this Father's Day card because of course I wait until the very last minute to make cards. It reads Supa Dad...or does it read Supa Bad? You know it, uh huh, rockin your Dockers and cell phone holsta.

Made by hand with an Xacto by printing/sketching on the back of white card stock in reverse then backing it up with blue and chili pepper colored papers.

Thanks so much for all the great feedback on my new Partridge & Pear pattern! I'm looking forward to working on Turtle Dove. But right now I think I might have drafted myself a peplum top that I can actually wear. I need to look into that further.

Monday, June 16, 2014

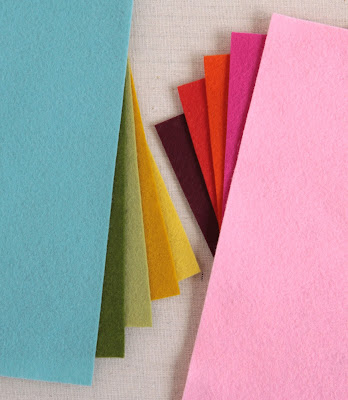
curated felt color collection/felt & floss guides for Partridge & Pear

Photo courtesy of Benzie Design


I am delighted to show you this ten-color felt collection I put together recently at Benzie Design. I chose the colors to match my favorite yellow and pink sample ornaments for Partridge & Pear.

Benzie felt colors in this collection:
1) Swan
2) Moss
3) Fern
4) Mustard
5) Ochre
6) Orange
7) Cotton Candy
8) Magenta
9) Burgundy
10) Peacock

If you want to match my samples above you can save some hassle/worry by purchasing this ready-chosen felt set from Benzie. (Note: as new patterns in the series are released, the listing will have new options for different color collections. Choose the one you want from the handy pulldown menu!)

Photo courtesy of Benzie Design

And looky, you can also purchase the handy add-on set of matching embroidery floss! You'll need matching floss for sewing the parts of the ornaments together so that set is a really nice feature and will save you some time squinting at the craft store. PLEASE NOTE: You will also need to purchase contrasting colors of floss for the decorative embroidery from your local craft store.


Yellow Partridge & Pear felt colors:
THE FRONT SIDE:
Ochre: Bird body and pear background
Mustard: Bird wing
Swan: Bird belly and plume
Moss: Bird beak, pear stem and pear inset
Fern: Bird beard and pear leaf
ON THE BACK SIDE:
On both ornaments I used Mustard for the backs (but sewed them together with floss that matches Ochre)

Yellow Partridge & Pear decorative embroidery colors:
DMC Blanc (white) or B5200 (snow white)
DMC 310 (black)
DMC 3844 (dk bright turquoise) partridge breast only
DMC 935 (dk avocado green)
DMC 891 (dk carnation)
DMC 3846 (lt bright turquoise)


Pink Partridge & Pear felt colors:
ON THE FRONT SIDE:
Cotton Candy: Bird body and pear background
Magenta: Bird wing and pear stem
Swan: Bird belly, plume and pear leaf
Orange: Bird beard
Burgundy: Bird beak and pear inset
ON THE BACK SIDE:
On both ornaments I used Orange for the backs, but used floss that matched the fronts when I sewed the front and back together.

Pink Partridge & Pear decorative embroidery colors:
DMC 310 (black)
DMC 3846 (lt bright turquoise)
DMC 947* (burnt orange)
DMC 917 (md plum)
DMC 741 (md tangerine)
DMC 154 (v dk grape)
DMC 818 (baby pink)

*This color is already included in the floss bundle

Wool blend felt // MmmCrafts // Benzie
Photo courtesy of Benzie Design
 
I love working with Benzie's wool-blend felt and I highly recommend her shop from my (many) felt purchases. You'll just have to visit to see the wide range of colors and sizes available and check out her blog too for lots of feltcentric tips and tutorials. Renae always offers friendly, accurate service and prompt shipping. I love getting her prettily packaged felt in the mail. It always feels like Christmas!

Renae, thanks for the opportunity to curate another collection! (See here and here for my previous collections!)

Thursday, June 12, 2014

Partridge & Pear pattern is now available!


The blog's been quiet lately because I've been feverishly working to finish this pattern. It's a bit later than I anticipated but still in plenty of time for lots of handmade pre-Christmas makery! This is the first of the Twelve Days ornament projects that I'll be releasing as they get done. I've worked out all the production kinks on this one so hopefully the other patterns will come faster as I go along. I'm really excited about this!


Make partridges and pears galore in whatever color scheme you like! I love being able to match any Christmas decor. They make such a unique handmade gift that will look beautiful on a Christmas tree for many years.


There is a No. 1 on the backs since this is the first of a series of twelve. You can also easily add the year or a name if you like, of course.


And let me tell you that you are going to LOVE how quick and easy these are to make. No pattern tracing or tedious embroidery transferring is required! If you know basic hand stitches, you can totally nail this project because of this lovely and magical stuff:


Sulky Printable Stick 'n Stitch (formerly known as Sulky Printable Sticky Fabri-Solvy) is quite possibly one of the best products to ever happen to felt crafters (thanks again, Wendi). It's a sticky backed stabilizer that you can print directly on. It washes magically off with water, leaving no trace of itself. And it is readily available and affordable! (There's a handy list of sources in the Resources section of the pattern.)

So, basically you print my pattern pieces directly on the stabilizer, peel off the backing, apply it to wool felt and stitch the embroidery designs directly through the stabilizer. Once the stabilizer is soaked away you are left with a perfectly executed embroidery design on felt. No pin dot tracing. No guessing. No fading ink marks. No re-appearing ink marks. FANTASTIC.


I know you are thinking, 'Wait a minute, you can't wash wool felt in water!' Oh, yes you can. The key to this process is to pre-shrink your wool felts the day before you start the project by simply soaking them in cold water and letting them air dry. It won't change the texture or thickness of the wool felt if you do it that way, and the pre-shrunk wool won't shrink when you soak off the stabilizer. I've tested this with wool-blend (wool + rayon) and also 100% wool felt and it works equally well for both. Are you excited yet?

(If for some reason you can't use the Sulky stabilizer, you can still make this project with the help of freezer paper. I've included instructions for that in the Resources section of the pattern.)

You can purchase this instant download Partridge & Pear pattern PDF in either my Etsy or my Craftsy shops. Go to my listing to get more details on the pattern itself. I hope you enjoy it!

P.S. You can get a preview of a few of the upcoming patterns because they will be based on the original ones I've made as gifts for my BFF:
Turtle Dove
French Hen and Collie Bird
I'm currently working on a couple of her ornaments and will be sure to show you when they are done too!