Monday, September 22, 2014

you'll be gladder without your bladder


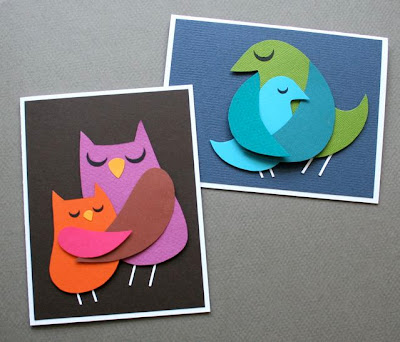
Gladder. That's not a word but it's funny. I quite enjoyed making these cards for Chelsea and Mattheus. It was a nice break from Christmas ornaments. My niece Chelsea has recently parted ways with her recalcitrant gall bladder...


(if you didn't know, this is really and factually what a sick gall bladder looks like)

 ...and neighbor Mattheus had a birthday.


Both cards are 4.25 x 5.5 inches folded (that way you can get two cards from one 8.5 x 11 sheet of card stock, so I prefer this size). You can see I was feelin' the black/chartreuse/green/orange color palette. The paper eight and the gall bladder were drawn and cut from card stock and then enhanced with colored pencils and punches. I used foam pop dots to elevate them on the black card stock and then added white gel pen details. Taped an iTunes gift card inside and voila!

FYI: If you are wondering about a felt color collection for Turtle Dove, Renae at Benzie Design is working one up as we speak! Great choice if you would like to make some Turtle Dove ornaments that are the same colors as mine. The felt bundle (with matching floss) will be available in her shop soon. I'll post about it!

Friday, August 29, 2014

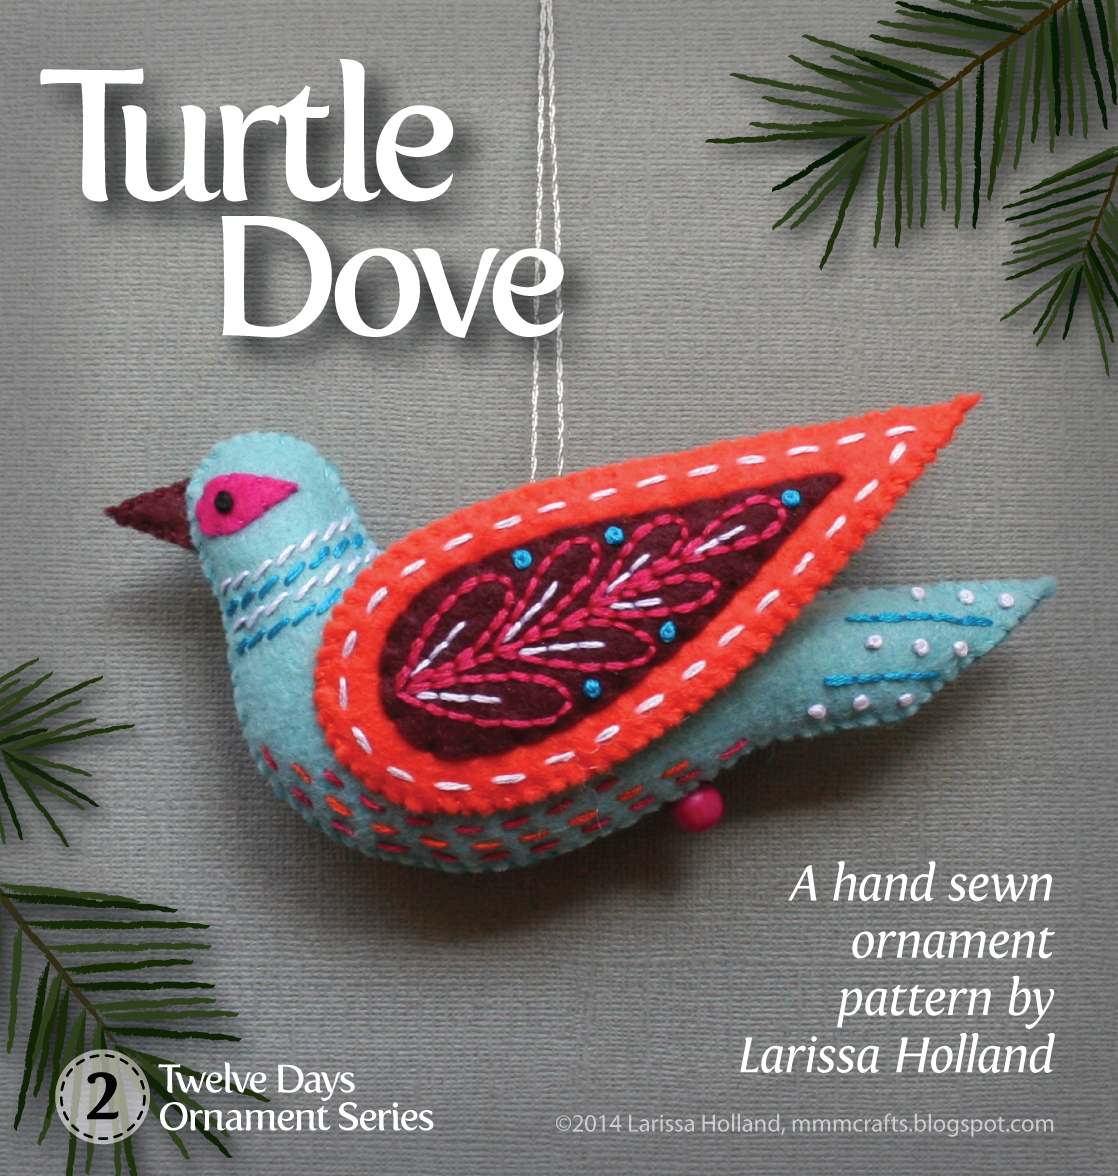
Turtle Dove pattern in the shop!


I'm done, I'm done! Here's the second ornament in the Twelve Days ornament series, Turtle Dove. (Here's the post for the first set, Partridge & Pear.) I'm really happy with the way this turned out and I'm still loving the Sulky stabilizer which makes this handmade ornament series so so easy to make. If you can handle basic embroidery stitches you can totally do this project, and do it well.


The key is the Sulky Printable Stick 'n Stitch (formerly known as Sulky Printable Sticky Fabri-Solvy), a wonderful felt crafting stabilizer. You simply print my ornament pattern on the water soluble stabilizer, adhere it to felt and then embroider right through it. No tracing or transferring complicated embroidery patterns by hand. Outstanding! Read through this earlier post to learn more about how the process works. I've listed some sources where you can purchase the stabilizer in the pattern.


You can purchase this instant download Turtle Dove pattern PDF in either my Etsy or my Craftsy shops. Go to the listing to get more details on the pattern itself. I hope you enjoy it!

Tuesday, August 19, 2014

what we're up to


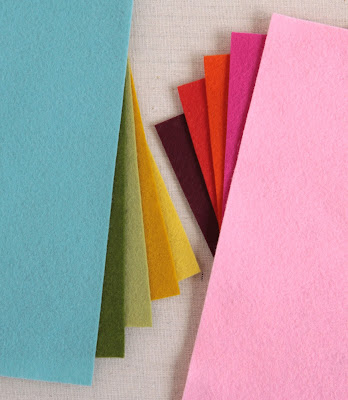
We are enjoying our summer school break! I'm busy sewing up ornament samples and tweaking the patterns for Turtle Dove, French Hen and Colly Bird. The picture above is wool felt that is drip drying in my laundry room. (Pre-soaking the felt is an important step that ensures your embroidered creations won't shrink when you soak off the Sulky stabilizer!)


You can see that after a quick press it's back to looking exactly like it was before the soak!


While I'm upstairs banging away at the patterns, Thing 1 is learning to touch type. She's doing really well! She's also reading The Hobbit to gear up for her first year in a homeschool academy starting in September. Middle school, here we come.


Thing 2 is busy playing Monopoly with her Equestria Girls. I'm sure there are some educational benefits to that. Economics. Math. Real estate. Funology.

And in other news, my Schmoopie bought me a bike! It's the kind that you can sit upright on and has a bell. Ding! Just like the one I loved during my family's brief move to Holland. And my favorite part is the huge, cushy Oma seat. Aaaaahhhh. I've been having fun riding the bike trails around here with him. I forgot how much I love to ride a bike. It's the one athletic ability I have.

Thursday, June 19, 2014

hand cut father's day card


After-the-fact post for this Father's Day card because of course I wait until the very last minute to make cards. It reads Supa Dad...or does it read Supa Bad? You know it, uh huh, rockin your Dockers and cell phone holsta.

Made by hand with an Xacto by printing/sketching on the back of white card stock in reverse then backing it up with blue and chili pepper colored papers.

Thanks so much for all the great feedback on my new Partridge & Pear pattern! I'm looking forward to working on Turtle Dove. But right now I think I might have drafted myself a peplum top that I can actually wear. I need to look into that further.

Monday, June 16, 2014

curated felt color collection/felt & floss guides for Partridge & Pear

Photo courtesy of Benzie Design


I am delighted to show you this ten-color felt collection I put together recently at Benzie Design. I chose the colors to match my favorite yellow and pink sample ornaments for Partridge & Pear.

Benzie felt colors in this collection:
1) Swan
2) Moss
3) Fern
4) Mustard
5) Ochre
6) Orange
7) Cotton Candy
8) Magenta
9) Burgundy
10) Peacock

If you want to match my samples above you can save some hassle/worry by purchasing this ready-chosen felt set from Benzie. (Note: as new patterns in the series are released, the listing will have new options for different color collections. Choose the one you want from the handy pulldown menu!)

Photo courtesy of Benzie Design

And looky, you can also purchase the handy add-on set of matching embroidery floss! You'll need matching floss for sewing the parts of the ornaments together so that set is a really nice feature and will save you some time squinting at the craft store. PLEASE NOTE: You will also need to purchase contrasting colors of floss for the decorative embroidery from your local craft store.


Yellow Partridge & Pear felt colors:
THE FRONT SIDE:
Ochre: Bird body and pear background
Mustard: Bird wing
Swan: Bird belly and plume
Moss: Bird beak, pear stem and pear inset
Fern: Bird beard and pear leaf
ON THE BACK SIDE:
On both ornaments I used Mustard for the backs (but sewed them together with floss that matches Ochre)

Yellow Partridge & Pear decorative embroidery colors:
DMC Blanc (white) or B5200 (snow white)
DMC 310 (black)
DMC 3844 (dk bright turquoise) partridge breast only
DMC 935 (dk avocado green)
DMC 891 (dk carnation)
DMC 3846 (lt bright turquoise)


Pink Partridge & Pear felt colors:
ON THE FRONT SIDE:
Cotton Candy: Bird body and pear background
Magenta: Bird wing and pear stem
Swan: Bird belly, plume and pear leaf
Orange: Bird beard
Burgundy: Bird beak and pear inset
ON THE BACK SIDE:
On both ornaments I used Orange for the backs, but used floss that matched the fronts when I sewed the front and back together.

Pink Partridge & Pear decorative embroidery colors:
DMC 310 (black)
DMC 3846 (lt bright turquoise)
DMC 947* (burnt orange)
DMC 917 (md plum)
DMC 741 (md tangerine)
DMC 154 (v dk grape)
DMC 818 (baby pink)

*This color is already included in the floss bundle

Wool blend felt // MmmCrafts // Benzie
Photo courtesy of Benzie Design
 
I love working with Benzie's wool-blend felt and I highly recommend her shop from my (many) felt purchases. You'll just have to visit to see the wide range of colors and sizes available and check out her blog too for lots of feltcentric tips and tutorials. Renae always offers friendly, accurate service and prompt shipping. I love getting her prettily packaged felt in the mail. It always feels like Christmas!

Renae, thanks for the opportunity to curate another collection! (See here and here for my previous collections!)

Thursday, June 12, 2014

Partridge & Pear pattern is now available!


The blog's been quiet lately because I've been feverishly working to finish this pattern. It's a bit later than I anticipated but still in plenty of time for lots of handmade pre-Christmas makery! This is the first of the Twelve Days ornament projects that I'll be releasing as they get done. I've worked out all the production kinks on this one so hopefully the other patterns will come faster as I go along. I'm really excited about this!


Make partridges and pears galore in whatever color scheme you like! I love being able to match any Christmas decor. They make such a unique handmade gift that will look beautiful on a Christmas tree for many years.


There is a No. 1 on the backs since this is the first of a series of twelve. You can also easily add the year or a name if you like, of course.


And let me tell you that you are going to LOVE how quick and easy these are to make. No pattern tracing or tedious embroidery transferring is required! If you know basic hand stitches, you can totally nail this project because of this lovely and magical stuff:


Sulky Printable Stick 'n Stitch (formerly known as Sulky Printable Sticky Fabri-Solvy) is quite possibly one of the best products to ever happen to felt crafters (thanks again, Wendi). It's a sticky backed stabilizer that you can print directly on. It washes magically off with water, leaving no trace of itself. And it is readily available and affordable! (There's a handy list of sources in the Resources section of the pattern.)

So, basically you print my pattern pieces directly on the stabilizer, peel off the backing, apply it to wool felt and stitch the embroidery designs directly through the stabilizer. Once the stabilizer is soaked away you are left with a perfectly executed embroidery design on felt. No pin dot tracing. No guessing. No fading ink marks. No re-appearing ink marks. FANTASTIC.


I know you are thinking, 'Wait a minute, you can't wash wool felt in water!' Oh, yes you can. The key to this process is to pre-shrink your wool felts the day before you start the project by simply soaking them in cold water and letting them air dry. It won't change the texture or thickness of the wool felt if you do it that way, and the pre-shrunk wool won't shrink when you soak off the stabilizer. I've tested this with wool-blend (wool + rayon) and also 100% wool felt and it works equally well for both. Are you excited yet?

(If for some reason you can't use the Sulky stabilizer, you can still make this project with the help of freezer paper. I've included instructions for that in the Resources section of the pattern.)

You can purchase this instant download Partridge & Pear pattern PDF in either my Etsy or my Craftsy shops. Go to my listing to get more details on the pattern itself. I hope you enjoy it!

P.S. You can get a preview of a few of the upcoming patterns because they will be based on the original ones I've made as gifts for my BFF:
Turtle Dove
French Hen and Collie Bird
I'm currently working on a couple of her ornaments and will be sure to show you when they are done too!

Friday, May 16, 2014

partridge & pear update


**This design is now available as a PDF pattern!**

 OK, y'all, I'm back in the saddle now as far as this Partridge & Pear ornament pattern goes. I have worked out the embroidery transfer method that had me so stymied a few weeks ago (let me just say, you are going to love how easy it is) and I'm currently writing the pattern and cranking out samples. Those two you see above were just finished using the final pattern.

Just wanted to throw out this update for those who are very patiently waiting for the pattern! Progress is being made. Thanks again for your great advice, Wendi and Abby!

Thursday, May 8, 2014

make a felt bouquet card for mom


I like to make cards. As well you know. Here's this year's handmade Mother's Day card. It's made of handcut felt flowers and leaves with a paper punch label in the middle.

Would you like to make a similar card? It's a cinch to make if you have some know-how, pretty felt and a little time. I'd say it is intermediate level crafting. Bonus: these flowers won't wilt and they won't cost a fortune. (Are you a beginner? Try this one!)

You will need:
  • A laser print of this template at actual size (no scaling)
  • Letter-sized piece of black card stock
  • Scrap of white card stock
  • Two 1/8 inch thick pop dots
  • Scraps of wool felt in various colors for the flowers (do not use acrylic craft felt!)
  • White pencil or gel pen
  • Black ink pen
  • Tacky Glue®
  • Scraps of freezer paper and a pencil for tracing
  • Small scissors
  • Toothpick
  • Black embroidery thread and a largish embroidery needle

1) Start by cutting the letter-sized black card stock in half so you have two 5.5 x 8.5 inch pieces. Keep one piece and set the other aside for later to make another card.


2) Fold the piece in half so you have a 4.25 x 5.5 inch card.


3) Now's the time to add your haiku on motherhood to the inside of the black card with a white gel pen. Or whatever message you like. Just in case you mess up. Because if you add the message now and mess up, no big deal; you can just use the extra half of the paper to make another card. If you wait and attach the elaborate, gorgeous flowery outside of the card and then mess the inside up you will have a slightly larger problem. Let the ink dry.


4) Write a cursive greeting on the scrap of white card stock with a black ink pen. You can do this. Don't cop out and print it from Microsoft Word. Handwritten is charming! Call up your best penmanship and keep it simple:
"I love you, Mom"
"For my Mom"
"Mummy Dearest"
Something like that. Just write it somewhere on the white card stock with plenty of room around. Practice if you need to.


5) When you are happy with it, use a light table or handy window to center your writing over the rectangle shape on the template and lightly trace the rectangle. Cut out the label and erase any stray pencil marks on the edges. (Or if you have a fancy label punch like mine, center your writing in the window and punch that baby.)


6) Put two pop dots on the back of the white label and place it in the center of your black card.


7) Lay freezer paper (shiny side down) over the template and trace all the flower and leaf shapes separately with a pencil. The shapes are overlapped on the template so be sure to trace the whole shape. Group the traced shapes together according to felt color, leaving a little space in between them for trimming.


8) Cut the freezer paper apart roughly by color grouping. Iron the freezer paper shiny-side-down on the corresponding colors of wool felt scraps. Carefully cut out the felt shapes with small scissors. Leave the freezer paper in place for now, and peel it off as you use each piece. It will help you keep your shapes oriented right side up.


9) Squirt a nickel-sized blob of Tacky Glue on a scrap of paper and use the toothpick to add small dabs of glue to the backs of the flower parts to layer them together. Less is more - it only takes a small dab here and there to adhere the parts. Don't worry about symmetry. It looks better when it's wonky.


10) Use all six strands of embroidery thread to sew a star in the middle of the orange flower as shown. Use one big stitch for each leg. Easy.


11) Test the two largest flowers in place on the card. You may have to trim a bit of the petal from the orange flower if it bumps into your pop dot. Keeping them in place with a finger, lift the edges and add a dab of glue to the middle of the backs with the toothpick. Don't glue the whole shape down. You need the edges loose so you can underlap the other pieces.


12) Now glue on the smaller roses, one underneath and one above the large rose.


13) Add the leaves, putting them in place first and then using small toothpick dabs of glue to secure them. (I use another toothpick that has no glue on it to tuck the ends under where I need to.)


14) You are almost done. Looks pretty nice already, huh? Use a white pencil or gel pen to add two curved lines like this:


15) Now add the last few little leaves to these stems.


16) TADA! A pretty, handmade bouquet of love for your mom and now you are the favorite child and now you have the satisfaction of making something special by hand! If you do make one, I'd love to see it! Share a photo by adding it here.


If you are running low on wool felt you could also make this card with paper flowers instead. Same instructions apply. I have ironed freezer paper on card stock with great success.

Looking for other card crafting ideas that you can use for Mother's Day? Here are some from previous posts:
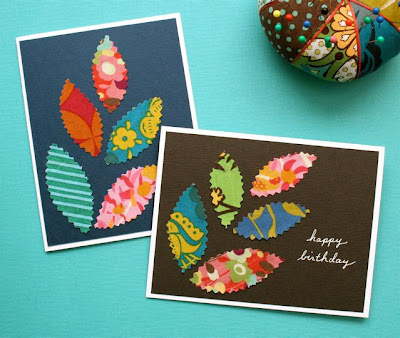
http://mmmcrafts.blogspot.com/2011/05/make-momma-bird-card-or-two.html

http://mmmcrafts.blogspot.com/2010/11/more-scrap-cards-you-make-one.html
  http://mmmcrafts.blogspot.com/2013/05/made-it-ms-pop-up-flower-card.html

Just a reminder that all of my paper crafts templates are for personal use only. Thanks so much for respecting that.