Thursday, May 8, 2014

make a felt bouquet card for mom


I like to make cards. As well you know. Here's this year's handmade Mother's Day card. It's made of handcut felt flowers and leaves with a paper punch label in the middle.

Would you like to make a similar card? It's a cinch to make if you have some know-how, pretty felt and a little time. I'd say it is intermediate level crafting. Bonus: these flowers won't wilt and they won't cost a fortune. (Are you a beginner? Try this one!)

You will need:
  • A laser print of this template at actual size (no scaling)
  • Letter-sized piece of black card stock
  • Scrap of white card stock
  • Two 1/8 inch thick pop dots
  • Scraps of wool felt in various colors for the flowers (do not use acrylic craft felt!)
  • White pencil or gel pen
  • Black ink pen
  • Tacky Glue®
  • Scraps of freezer paper and a pencil for tracing
  • Small scissors
  • Toothpick
  • Black embroidery thread and a largish embroidery needle

1) Start by cutting the letter-sized black card stock in half so you have two 5.5 x 8.5 inch pieces. Keep one piece and set the other aside for later to make another card.


2) Fold the piece in half so you have a 4.25 x 5.5 inch card.


3) Now's the time to add your haiku on motherhood to the inside of the black card with a white gel pen. Or whatever message you like. Just in case you mess up. Because if you add the message now and mess up, no big deal; you can just use the extra half of the paper to make another card. If you wait and attach the elaborate, gorgeous flowery outside of the card and then mess the inside up you will have a slightly larger problem. Let the ink dry.


4) Write a cursive greeting on the scrap of white card stock with a black ink pen. You can do this. Don't cop out and print it from Microsoft Word. Handwritten is charming! Call up your best penmanship and keep it simple:
"I love you, Mom"
"For my Mom"
"Mummy Dearest"
Something like that. Just write it somewhere on the white card stock with plenty of room around. Practice if you need to.


5) When you are happy with it, use a light table or handy window to center your writing over the rectangle shape on the template and lightly trace the rectangle. Cut out the label and erase any stray pencil marks on the edges. (Or if you have a fancy label punch like mine, center your writing in the window and punch that baby.)


6) Put two pop dots on the back of the white label and place it in the center of your black card.


7) Lay freezer paper (shiny side down) over the template and trace all the flower and leaf shapes separately with a pencil. The shapes are overlapped on the template so be sure to trace the whole shape. Group the traced shapes together according to felt color, leaving a little space in between them for trimming.


8) Cut the freezer paper apart roughly by color grouping. Iron the freezer paper shiny-side-down on the corresponding colors of wool felt scraps. Carefully cut out the felt shapes with small scissors. Leave the freezer paper in place for now, and peel it off as you use each piece. It will help you keep your shapes oriented right side up.


9) Squirt a nickel-sized blob of Tacky Glue on a scrap of paper and use the toothpick to add small dabs of glue to the backs of the flower parts to layer them together. Less is more - it only takes a small dab here and there to adhere the parts. Don't worry about symmetry. It looks better when it's wonky.


10) Use all six strands of embroidery thread to sew a star in the middle of the orange flower as shown. Use one big stitch for each leg. Easy.


11) Test the two largest flowers in place on the card. You may have to trim a bit of the petal from the orange flower if it bumps into your pop dot. Keeping them in place with a finger, lift the edges and add a dab of glue to the middle of the backs with the toothpick. Don't glue the whole shape down. You need the edges loose so you can underlap the other pieces.


12) Now glue on the smaller roses, one underneath and one above the large rose.


13) Add the leaves, putting them in place first and then using small toothpick dabs of glue to secure them. (I use another toothpick that has no glue on it to tuck the ends under where I need to.)


14) You are almost done. Looks pretty nice already, huh? Use a white pencil or gel pen to add two curved lines like this:


15) Now add the last few little leaves to these stems.


16) TADA! A pretty, handmade bouquet of love for your mom and now you are the favorite child and now you have the satisfaction of making something special by hand! If you do make one, I'd love to see it! Share a photo by adding it here.


If you are running low on wool felt you could also make this card with paper flowers instead. Same instructions apply. I have ironed freezer paper on card stock with great success.

Looking for other card crafting ideas that you can use for Mother's Day? Here are some from previous posts:
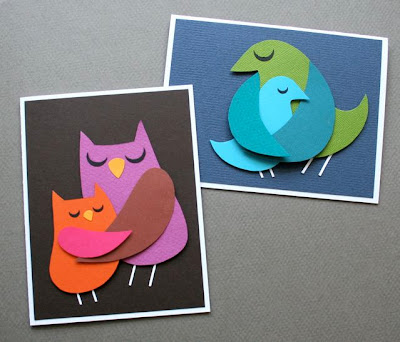
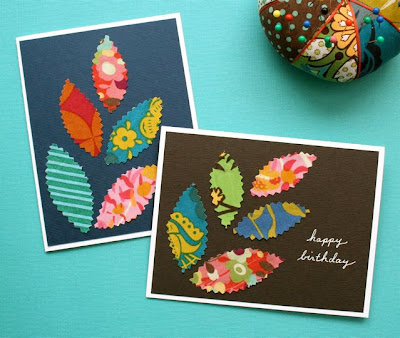
http://mmmcrafts.blogspot.com/2011/05/make-momma-bird-card-or-two.html

http://mmmcrafts.blogspot.com/2010/11/more-scrap-cards-you-make-one.html
  http://mmmcrafts.blogspot.com/2013/05/made-it-ms-pop-up-flower-card.html

Just a reminder that all of my paper crafts templates are for personal use only. Thanks so much for respecting that.

Wednesday, April 2, 2014

mr wormy apple gift tag tutorial


Cute gift tags are fun. Y'all know I love making gift tags that double as cards (like this and this). I'm all about two birds with one stone. This is my latest iteration for kids' gifts, and includes a bonus -- a cute, poseable toy worm to play with after the party is over. Here's a how-to for you.

You'll need:
  • This template
  • Letter sized 8.5 x 11 in. red card stock
  • scraps of green, black and white card stock
  • paper glue and fabric glue (like Fabri-Tac®)
  • a toothpick
  • a standard 1/4 in. hole punch and a 1/8 in. hole punch
  • scissors
  • bone folder or butter knife for scoring
  • two pipe cleaners, one green and one yellow
  • one small green pom and one red mini-pom
  • two 1/4 in. googly eyes
  • piece o' tape
  • gel pen
  • string for tying tag (I like pretty baker's twine)

1) Print the template at actual size (no scaling) on your red card stock. You'll have enough to make two tags. Cut out one rectangle and set the other aside for later. Cut out the leaf template and set aside.


2) Use your bone folder or butter knife to score the fold on the apple card. Fold the rectangle in half and cut the apple shape out, being sure to leave the connected parts uncut so your card will open and close. Then flip it inside out so any stray toner marks will be on the inside.


3) Use the leaf template to trace a leaf on green card stock. Use the bone folder to score a line down the middle. Cut out the leaf and erase any stray pencil marks. Fold it along the score.


4) Use the standard 1/4 in. hole punch to make a nice worm hole in the top apple layer only, as shown.


5) Cut out a small rectangle from black card stock to use as a stem. Glue the stem at a jaunty angle to the back of the apple.


6) Dot a small amount of glue to the bottom corner edge of the leaf and place it as shown.


 7) Use the standard 1/4 in. hold punch to make one circle of white for a nice shiny highlight. Use the toothpick to dot on some paper glue and stick it toward the top right as shown.


8) Now for Mr Wormy. Cut a 5 inch piece from both pipe cleaners. Set the extra pieces aside to make another Mr Wormy later. Twist the pipe cleaners together to create a stripey body. On the tail end, fold over the very ends and crimp firmly so they will stay wound together and there will be no sharp wires poking out.


9) Add a nice dot of fabric glue to the green pom and stick the sharp ends of the worm neck inside the pom through the glue. Hold in place for a minute so it will set.


10) Use a toothpick to add dots of fabric glue to the other side of the pom so you can attach the red mini-pom nose and the two googly eyes. I like to say googly eyes. Googly eyes!


11)  Now's the time to write a name on the outside of the card and a greeting on the inside. I like to use a white gel pen. It looks nice.

12) Punch a 1/8 in. hole in the top of the stem for the baker's twine or string.


13) Feed the tail end of Mr Wormy through the worm hole until you have just the right amount showing outside the card. Have fun bending his head into a charming angle. Tape the end of the worm to the inside of the card so he stays in place until the gift giving is over.


That's it! All that's left is to tie your awesome, handmade, googly-eyed Mr Wormy gift tag to your present and congratulate yourself on saving a trip to the card store. (high five self)

Tuesday, March 4, 2014

Wee Princess Pea pattern review by Wendi Gratz of Shiny Happy World

Pattern Review - Wee Princess Pea: A Purse-Sized Fairytale Playset
 Photo courtesy of Wendi Gratz

Do you know about Wendi Gratz? She's the creator and author of Shiny Happy World, a name which aptly describes her brightly colored and cheerful softie, quilt, and embroidery designs. Here are just a couple of things from her shop:

 The Hurrier I Go the Behinder I Get - embroidery pattern from Shiny Happy World

 Winter Wear for the Dress Up Bunch rag dolls from Shiny Happy World

You can see she is quite a talented designer and maker with a lot of practical know-how and I am so delighted to share this pattern review she wrote recently for my Wee Princess Pea.

If you've been toying with the idea of making that project you'll find she's written a helpful and thorough review. I love how her Wee Princess turned out! That's a photo of her set at the top of the post. Look at the pretty contrast blanket stitching and happy colors. She made a few clever mods and gave it her own signature style. There are more great photos to see on her post.

After a look at the review, you'll thank yourself to have a look around the rest of her site for her free patterns and very helpful tips and lessons. Thank you, Wendi!

Saturday, March 1, 2014

lining for my Wiksten tunic


So I did end up lining my Nani IRO Wiksten tunic (with very purple lining fabric). You know, the one that kept crawling up my leggings. The lining makes a huge difference, not just with the embarrassing cling but also improves the drape. It was well worth the effort, even though lining it after it was already made was more of a pain.


I simply cut out another front and back from the pattern in lining fabric, then cut off about .75 inch allowance all around the neck and armholes so it wouldn't show underneath. I also cut off an inch from the hem. After I sewed the front and back together, I finished all the raw edges by zig zagging them with matching thread. Simple simple:


Then to attach it to the inside of the tunic I hand sewed it wrong sides facing just in certain spots: at the shoulder seams, underarms, and two spots close to the hem on the side seams. Voila. I will now shock you with a real life picture of my school room:


Sorry for the blurry mirror shots and also for the smeary handprints that are featured in the foreground. It reminds me of a magnet I saw the other day: 'Please excuse the mess but we live here.'

Sunday, February 23, 2014

yes, another doll quilt and pillow


More stash busting, this time for a girlie girl we love named Jocelyn, who just turned seven. I'm told her American Girl doll needs a cozy place to sleep so this set will be put to good use right away. The charm pack du jour is Hoopla by Moda. I have really loved putting these quilts together. They make a special and useful handmade gift but are not a huge investment in time or materials. You probably have what you need on hand to make a set at any given time given a couple of evenings notice.


The blue on white swiss dot fabric just keeps on giving. What a great thrift store find that's been. I used it here for the backing and also for the pillow. And I still have a few more yards.


I think that's all the doll quilts for now. I have another top pieced together from the Magical Endless Box of Charm Squares, but no end user in mind for it yet. And I have acquired much quilting knowledge. I have now installed and used my walking foot (thanks to this helpful tutorial) and am comfortable with square corner binding. Baby steps.

Thursday, February 20, 2014

doll quilt and pillow for Darcy


I started this doll quilt for my 2 year old great niece the same night I started these. (I have a LOT of unused charm squares so this will not be the last doll quilt you see.) This is a pastel set of Amy Butler squares I bought an age ago. I decided to add another row to make it a square quilt this time. Aaaand this time I broke down and did actual machine quilting and binding. So I guess you could say this is my very first completed actual For Reals bonafide quilt. Yay!


It's really squared up quite nicely despite the wonky look of the photo. After this I figured out there is a presser foot designed for perfect 1/4 inch seams (I'm a novice quilter OK? haha). I ordered that baby right away on Ebay and it's en route. That should make piecing more accurate. 

All fabrics were pulled unearthed from my stash. That's a coordinating Amy Butler print for the backing and pillow. (My mom is here visiting and she's trying to organize my fabric shelves, bless her.)


Thought I'd give it a test run with an actual doll! I hope Darcy will enjoy it. Happy birthday, sweet girl.

Sunday, February 16, 2014

doll quilts and bookmarks


These lovey bookmarks and mini quilts were last minute brainstorms for my girls' handmade Valentine treat. It's a good thing too because my raspberry Jell-o cookies were kind of a fail. I thought chocolate chips would be good to add. Raspberry and chocolate. Great combo, right?


Mmmm not so much. My bad. And the recipe I followed for the jell-o cookie part seems to have too much salt and too little sugar? Or maybe I just messed up along the way somewhere. That seems more likely. I tried to rectify the situation by making a powdered sugar glaze to drizzle over them. They are OK. Edible. A pretty color. Just. Not yummy.


So, the bookmarks. I took my own advice and used my Love You bookmarks tutorial to make these, this time with gray paper. Easy, quick and makes a nice, sturdy (and pretty) bookmark. I wrote a sweet Valentiney message on the backs, since these also functioned as the gift tags.


My girls are still very attached to their stuffed animals and dolls. I noticed they were using all my wash cloths and hand towels as doll blankets, so I clued in that they might enjoy a couple of doll quilts. Shoulda done this years ago.

I started the quilts Thursday night because yes I'm a crazy person. They were technically finished on Valentines Day, but kinda late in the day (that seems to be turning into a bad Valentine tradition).


Goodness knows I have enough charm squares to spare, so I spent some time digging in the box and came up with these two combos and also two more that I'm going to sew together as gifts. I guess you'll be seeing those in due time. These are sewn almost exactly like the binky is sewn in my Baby Binky Bunny pattern, except this time I added some 1/8" batting inside. Don't look too closely. I can't seem to piece even the simplest things accurately. How do people do a queen sized quilt with tiny pieces and it still comes out matched up? I bow to you.


I still managed to avoid 1) Quilting 2) Binding. Win Win. Instead of binding I sewed/turned. And instead of quilting I used old-fashioned ties to hold the layers together.  The backs are two different colors of Kaufman Essex.


And now my hand towels and wash cloths can serve their true purpose. Stinky and Mushmellow will never miss them.